google-site-verification: googlef2ba99a3ab5aecea.html

Friday, August 19, 2016

Fresh Pasta Sauce For Lazy Cooks

The notion of traditional homemade pasta sauce is so romantic. Thinking about lovely red tomatoes, simmered for hours with fresh Italian spices, is simply delightful. Well, it would be delightful to eat... but (for me) not to make.
Confession: I don't like to cook!
So, when I found my kitchen full of this year's tomato harvest, I knew I'd need to find a few ways to cut corners. If I was going to be motivated to cook with them, I needed a few short cuts!

Enter: Instant Pot pasta sause


After all, they were simply too pretty not to use!
Luckily for me I have two new kitchen gadgets that help speed along the process quite well!

Meet my gadgets:

The Instant Pot and the Stick Blender. These are 2 kitchen accessories that I recommend any cook (lazy or otherwise) add to their arsenal.


Step One:

Simply wash and dice your tomatoes.
There'll be no blanching or removal of seeds here. This is a guide for lazy cooks!


I used a mix of roma tomatoes, and beefsteak. While traditionally, marinara sauce is made with just roma tomatoes, any kind will work.

Then, just toss diced tomatoes into your Instant Pot (see link above). I didn't measure at all, I just kept chopping and filling until I got close to the "Max Fill" line.

Instant Pot pasta sause


Step Two:

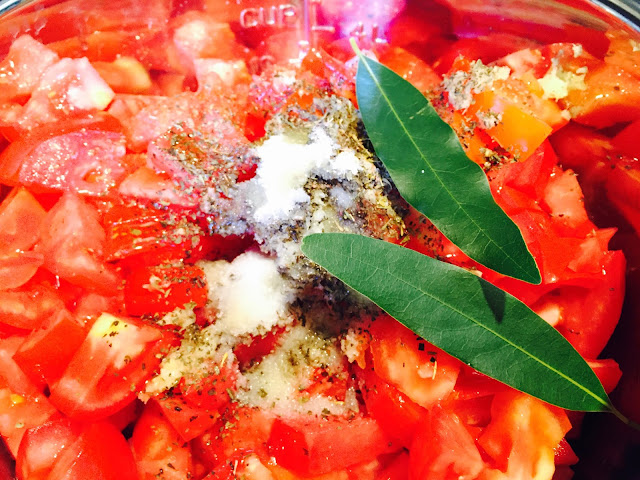
Toss in some flavor. Again, I din't measure anything here (remember: lazy).
I added (what was probably about 2-3 teaspoons of) dried thyme and basil.

Drizzle a (roughly) few tablespoons of olive oil into the mix too.

Also, because I happened to have fresh garlic around I added about 4 cloves of that.


I squished it in the garlic press, but since you'll be using a stick blender later, you probably don't even need to bother with that; just toss 'em in.


If you don't have fresh garlic, a couple teaspoons of garlic powder would work too.


Step Three:

I'm so fortunate, because anytime I want to use bay leaves in my cooking, I just walk out to my backyard and grab a couple off of the huge bay laurel tree growing outside my door. 


If you don't happen to have one of these trees nearby, don't fret, you can also get bay leaves dried in the spice section of your grocery store.

Toss a couple of bay leaves in with all the other ingredients, and add some salt. I put in (about) 3 teaspoons of salt. Be careful with the salt though, don't go overboard. You can always add more salt later if you want to.

Instant Pot pasta sause

Mix it all up with a big spoon and secure the lid of the Instant Pot. 

Then, set your Instant Pot to "Manual/High Pressure" for 10 minutes, Quick release (QR). 

Walk away. Do something else for a while. Bonus points for doing something frivolous!

Now you just let it do it's thing. It will take a little while to heat up, then it will go through the cooking cycle (counting down from 10). 


Once it's done release the steam/ pressure by moving the little lever on the lid. Wait for it to stop steaming and carefully remove the lid.  


Instant Pot pasta sause

Step Four:

Remove bay leaves and discard.

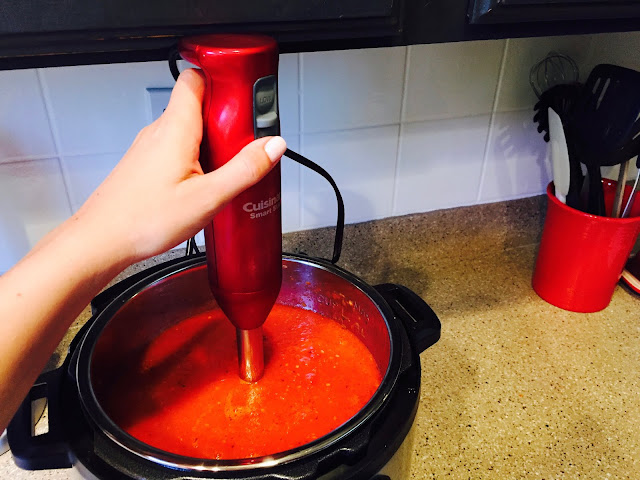
You'll notice that, while it looks beautiful, it doesn't quite look like tomato sauce yet. This is easily fixed. Just grab your stick blender, set it to high and give it some good swirls through the sauce. 

Instant Pot pasta sause

I blended for about a minute. I wanted it to still be slightly chunky, with some larger pieces of tomato remaining. For the most part seeds and skin get mashed up with everything else. And, if a few of these remain, it's all the better because it means you can tell that this is fresh sauce. No jars here baby!

Step Five:

You might notice that the constancy is a bit too watery. No problem! Just dump all of the sauce into a fine mesh strainer. 


Immediately some of the watery part will drain out. Give it a couple of swirls with a mixing spoon to help it along. For even thicker sauce, let it sit for a minute or two. Or, transfer immediately back to Instant Pot (or other) container. 

Stir and serve!


Store in the refrigerator for up to five days, or freeze for later use (up to six months). 
Enjoy, and be sure to brag about how you made this fresh tomato sauce "from scratch"!

That's all, thanks for stopping by!


Linking up to these fun parties:

http://tidymom.net/2016/homemade-after-school-snack-recipes/
http://www.oneprojectcloser.com/creativity-unleashed-link-party/
http://www.mysuburbankitchen.com/2016/08/pinworthy-projects-party-162/#
http://dianarambles.com/2016/08/pin-linky-party-203.html
http://www.avisiontoremember.com/2016/08/the-creative-exchange-august-18.html


Thursday, August 18, 2016

How to Make Drip Castles

Summer is almost over! We have been enjoying soaking up those last rays of warm sunshine, and spending as much time as we can outdoors! One thing we enjoy doing, both at home and on vacation, is going tho the beach and playing in the sand.

how to make drip castles

Growing up in San Diego, one of my favorite things to do as a child was go to the beach and build drip castles. I still remember the day my mom first showed me the simple magic that is a drip castle!

how to make drip castles

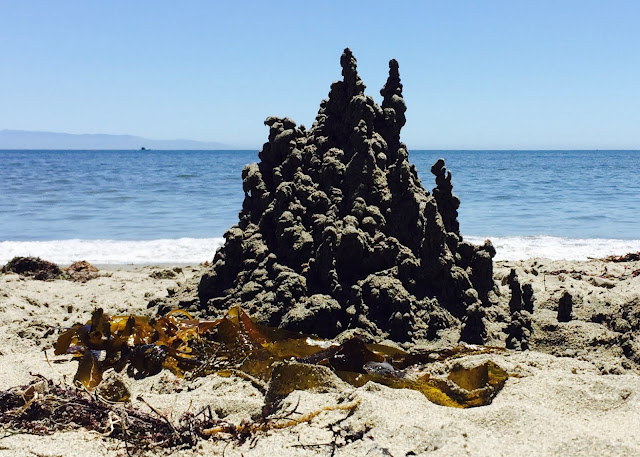
Drip castles rise from the shore like mythical mermaid mansions. But, they are also really easy to create! I've tried making these with (backyard) sand box sand, and it doesn't work as well. I'm not sure if you need the salty sea water, or the fine beach sand, but for some reason I've only been able to make these at the beach.

To start, make a regular sand castle (just a pile if damp sand). This will be your base.


Usually about a foot will be tall enough. But you can make your castle as elaborate and large as you want to!


Next fill a container with ocean water. We've had this little sand play set for years, and love it!


Next, add some sand to the water in your bucket. I usually fill it about 3/4 full of sand. You'll want to keep it VERY watery.


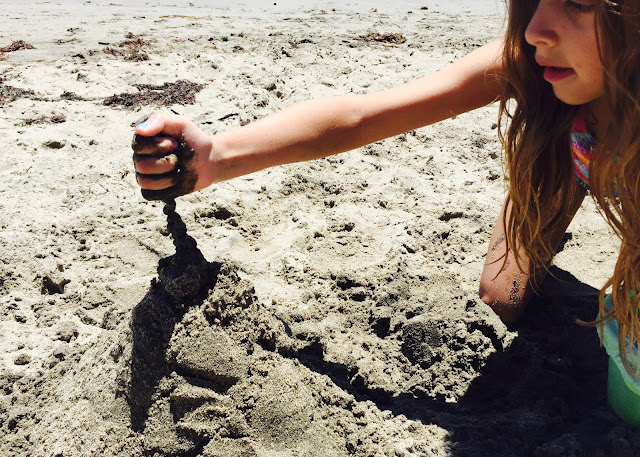
Now comes the fun part! Dip your hand into the water and grab a handful of sand. You want it to be very drippy. Then quickly (before too much of the water drains out) drizzle the sand onto your castle.

how to make drip castles

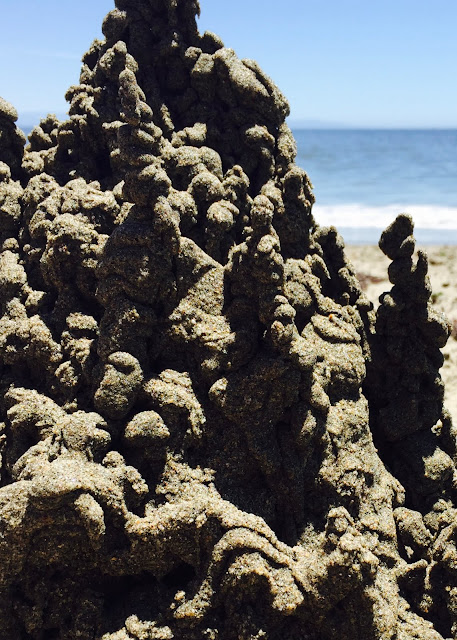
After a few seconds, the sand in your hand will become dry, and start to clump. That's when you know to go back for a fresh scoop. Eventually, you will notice the sand begin to pile up on top of itself, creating and otherworldly formations.

how to make drip castles
Add caption


Play around with moving your hand slowly to the side, and keeping it in one place. You'll discover that you can create a variety of shapes and towers!

how to make drip castles

It's fun to see how tall you can make them! Sometimes it can also be fun to add a few "guard towers" on the flat part around your castle.

how to make drip castles
Add caption


Sometimes, if we are very careful, we are even able to make small holes, tunnels and bridges!

how to make drip castles

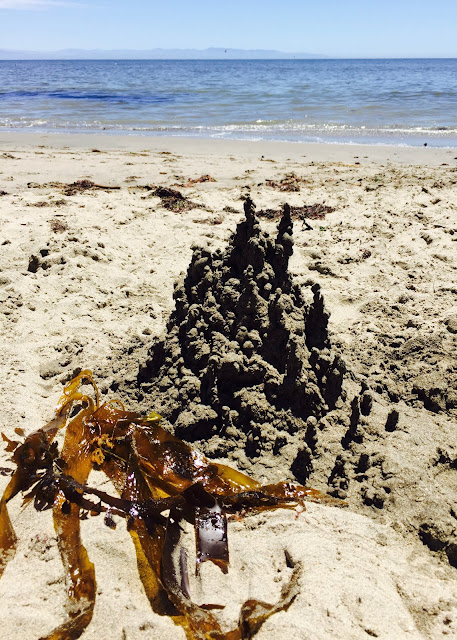
If you stay at the beach long enough, eventually you'll notice that even once your drip castle is dry, it will still retain it's shape!
Encourage mermaids and other sea creatures to visit by embellishing your castle with found objects. Things like kelp and shells work great for this!

how to make drip castles
Add caption

Sit back, soak up the sun, and enjoy your handiwork!

how to make drip castles


That's all, thanks for stopping by!


Linkning up to these fun parties:

http://livelaughrowe.com/vegetable-side-dishes/
http://www.artsyfartsymama.com/2016/08/artsy-fartsy-link-party-3.html
http://staceyembracingchange.com/2016/08/18/creative-inspirations-linky-party-and-features-10/
http://www.posedperfection.com/2016/08/creative-ways-link-party-119-and.html
http://tidymom.net/2016/homemade-after-school-snack-recipes/
http://www.oneprojectcloser.com/creativity-unleashed-link-party/
http://www.mysuburbankitchen.com/2016/08/pinworthy-projects-party-162/
http://dianarambles.com/2016/08/pin-linky-party-203.html
http://www.avisiontoremember.com/2016/08/the-creative-exchange-august-18.html


Saturday, August 6, 2016

Homeschool Room Tour


The long lazy days of summer will be winding down soon.  And, as much as I'd love to just lay back and mindlessly soak in the sunshine, thoughts of the school year ahead are drifting into my mind.

September is just around the corner!


This is the time of year that many homeschooling parents begin to think about how we arrange our space. So, in the spirit of a new academic year, I present a tour of our homeschool room!

I have also added direct internet links to the various items I have around the room, so that you can easily add them to your space if you wish..
Also, because I love "before and afters," I included some photos the original space originally when we bought our house (about two years ago).

Climb the stairs and join us! Welcome!

Stairs, before


On your way up the staircase, you will see a few bulletin boards as well as vintage inspired maps and scientific diagrams. To keep the space warm and welcoming, I use natural materials and subtle colors. 


The "posters" are actually intended to be wrapping paper, but they work great as decor on the walls! I love their classic look and soft colors. I found ours at a museum gift shop, and Amazon carries a lot of them too (here are just a couple of examples):


As soon as you round the corner at the top of the stairs and enter the space, you'll see where we do the bulk of our work. 
We spend the majority of our time at the sturdy vintage table. It was a lucky flea-market find that's held up to 3 kids really well! 

waldorf homeschool room

I am fortunate to have a large space that I can dedicate just to homeschooling. I know that not everyone does. When I first started homeschooling all I had was a desk in our entryway! So if you don't have a whole room, please know that I understand what that's like too (and be sure to check out the folding furniture I will discuss below).
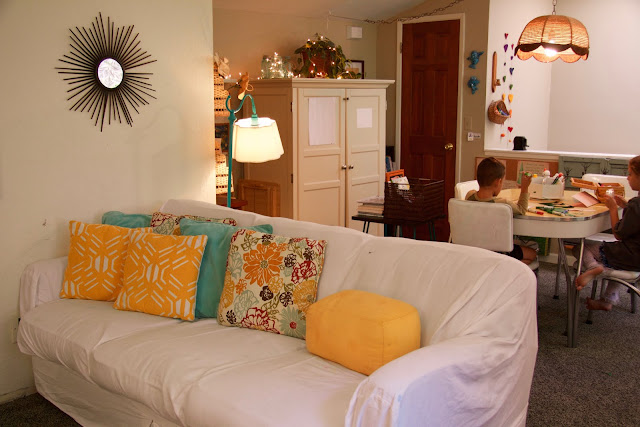
Part of what sold me on the house we're in now was the potential of the upstairs space. This big room now doubles as both a place of learning, and a family room.

waldorf homeschool room

As you can see in the photo above, about half of the room functions as a comfy area to relax. We enjoy sitting on the couch to do our reading.

family room

And, the kids like to watch movies here (a TV is intentionally hidden in the armoire pictured below).

family room

I've tried to make the space welcoming, yet versatile too. I particularly like the chairs and table in this little conversation area because they fold, and are easily collapsed and moved out of the way. This is very helpful when (for example) you get a really good game of "ring around the rosie" going!


Having folding furniture is great if you are short on space too! I get everything from Amazon these days! Her are the exact chairs and tables I have:


I also really like this wall mounted murphy desk, because it can also be folded up to make room for extra floor space.

waldorf homeschool room


And, speaking of things that can be hidden away...  I disguise many unsightly things in the big white cabinet.
When the doors are open, it's actually a computer desk! I love that I can close the doors and hide things like the printer and the laminator (both things I love to have, but that I don't love to look at).
I found this particular one on Overstock.com. 

waldorf homeschool room

I love curriculum, books and educational materials. As a result I have stock piled WAY too much of it. Between my days in college earning my teaching credential, my years as a reading intervention teacher and now as a I enter my 4th year as a homeschooler, I have managed to acquire quite a collection!


Someday I fully intend to sort through my stash, and hopefully get rid of  lot of it. But, for now it all stays with us, suspended in state of "organized" chaos.  
Books and curriculum that are not in regular use are stored in the closet.  Meanwhile, the resources that are in regular rotation stay in a simple cube shelf next to my desk.

waldorf homeschool room
I love having over-the-door shoe rack inside the closet door (pictured above). It is a great way to store small things like art supplies, pencils (and so on). I love that it is made of natural material (and not cheap plastic). But, my only regret is that I didn't get one with clear pockets, like this:


The cube shelf is something that you can find at just about any big box store, or online. You can also get canvas bins made to fit in the cubes which are nice to have. Mine is similar to this...


I like that the back isn't solid because I can have access to the electrical outlet behind it.

And, speaking of storage, I still have two "littles" in the mix, who don't have very long attention spans! So, I keep a stash of puzzles and busy bags on hand for them to use while I work with my oldest. They are all easily accessible, while simultaneously stored out of sight in a wooden (Ikea) shelf. 


The puzzle rack on the top right has been a life saver. I like that it's easy for my kids to clean up the puzzles themselves, and that it's made of natural wood. This is the one I have: 

`

No children's' space would be complete with a little bit of whimsy. I've added this throughout the room with simple additions like lighting, wool felt garlands, and more.


I LOVE lighting. It can really make or break a space. One way that I brightened up a dark corner of this room, was by draping string lights over a shelf bracket mounted on the wall. The trick to this is, to use lights with a white cord (not a standard green one).


For an easy on/off situation with my collection of lights, I have everything plugged into switches. 


But, any power strip (with a master switch) will do. You'll be more likely to use all the lighting if it's easy to turn it all on at once!

The element of subtle whimsy continues as you move through the room...


I am very inspired by Waldorf education, and incorporate elements of this theory into my homeschooling (like with the "math gnomes" pictured on the bulletin board below). 


I was an Art major in college, so I still have a lot of my old supplies. Plus we enjoy crafting and creating. So, here are some photos of how I keep all the gear, supplies (and, let's face it... "the mess") corralled.

 
Luckily the back section of the room even has a linoleum floor for easy clean up!


You may notice (in the picture above) my solution to having a place for works of art to dry. When I looked for drying racks, all that I could find were giant racks made for entire classes' worth of work. So, instead I use a wooden shoe rack, and it works great! 


Also, Ikea's easel is just as good as the more expensive versions!

And, in closing I'll leave you with a few more "Before and Afters" just for fun.

Before

After


Before


After


Before


After

I hope that you feel inspired after scrolling through this post! Please feel free to leave me any comments or questions you have. Also, if you do a post on your homeschool space please leave a link. I love peering into the spaces that others have created!


That's all! Thanks for stopping by!


Linking up to these fun parties and round ups:

http://www.flourmewithlove.com/2016/08/mix-it-up-monday.html

SaveSaveSaveSave