google-site-verification: googlef2ba99a3ab5aecea.html
Showing posts with label budget friendly. Show all posts

Monday, April 24, 2017

Garage Dance Party Spectacular!

Following on the heels of my most recent posts (about our rainbow party) today I'll be showing you how we transformed our ordinary garage into a rainbow wonderland all ready for a dance party!

Both kids and adults were captivated by this fun and easy to make space. You can make a "room" like this too!


This project was both inexpensive and simple!

Supplies you'll need:

-Rectangular colored plastic table cloths, about 8 of each color. I found most of mine at the Dollar Store.
You can also buy them inexpensively online:


-Packing tape, or duct tape


-A staple gun and staples


Disco ball (this is the one I used):


*Note: The disco ball doesn't run on batteries. It plugs in. So you may need an extension cord too.

-(Optional): Checkerboard floor tiles. These are peel and stick and easy to use. You can just put them right onto the cement in your garage. You'll likely need a scraper to get them off though (or just leave them there and have a neat garage floor!). For a floor about the size of mine (12'x12') you'll need 8 boxes.


It's time to start!


If you chose to make a checkerboard floor, install it first. We centered ours in the middle of the garage, leaving space around the edges for all the junk we keep stashed in there. If you have junk too (as most of us do!) Don't worry about it, we'll hide it later!


If you don't want to stick anything to your floor, you can also rent a checkerboard dance floor from a party/ wedding supply business.

Add lighting


If you have an electric garage door opener, it's possible that you also have an electrical outlet there too. Then you can easily plug in your disco ball. If you don't have one nearby that's okay. Just run an extension cord to your nearest power source. Attach it to the rafters or ceiling to hide it from sight. 


Note: at this point any kids in the household will be ready to dance. Have music ready!

Make a rainbow!

Using your tape, connect the narrow ends of two (same color) table cloths. This should give you enough length to drape it from the center of the ceiling, to close to the floor (of a two car sized garage).


Now it's time to start hanging the sheets of color! I attached one color at a time and worked my way around the room in a circle. 

First I gathered one end of the table cloth into a bundle and wrapped tape around it to secure it together. Then I attached that bunched end to the ceiling directly above the base of the disco ball. 


Leaving a little slack so that it would hang loosely,  then I flared each piece open wider and attached it to the rafters. I made sure it was secured directly above the edge of the dance floor. Then I let the rest of the length just hang down towards the floor. This way I created "walls" for the space.


If you are adhering the table cloths to a wall, or wooden rafters, it's easiest to use a staple gun. But, these are so lightweight that you could even just use tape too. 


Kids will start to get REALLY excited now! Take a break and bust a move!


Keep working your way around the room, creating a "tent" of color. Leave a few feet of empty space for an easy entranceway. And if any parts are too long, simple trim away the access with a pair of scissors. 


Then just add a playlist of fun dance music, turn on the disco lights and enjoy!


Thanks for stoping by, and happy dancing!


For MORE information about how to host your own rainbow party, see these posts:

Rainbow Party Goodie Bags 


DIY Hand Kite Favors


Linking up to these fun parties:


Thursday, March 9, 2017

Rainbow Party Favors; Goody Bags

Any time of year is great for colorful rainbow themed parties. Usually, they seem to pop up closer to St Patrick's Day (this year it's on March 17). But, I’ve never been one to “follow the rules”. 
So, I say... if you want to throw a rainbow party, do so at anytime!


When I first started searching Pinterest for rainbow party ideas, I felt a little intimidated. There were hundreds of photos, of flawlessly executed parties… parties that looked like the had been designed and set up by professionals. Even the tutorials were intimidating in their perfection! 

You will not find that here.

Instead, I am going to do a series of blog posts on how I (a mere amateur) put together my kids’ rainbow theme birthday party. Plus, I was able to do so easily and inexpensively.  Almost everything was DIY, or at the very least, purchased from inexpensive and accessible sources. 

No professional planner was used in the creation of this celebration. This is real life, and I was the planner!

Because it’s what I started with, today I am going to focus on the favor bags that I put together to share with our guests.


It was fun and easy to gather the elements for these, and they were a big hit! The best part was that I was able to order every single thing without leaving the comfort of my own couch (Oh, Amazon Prime, how I do love you so!)

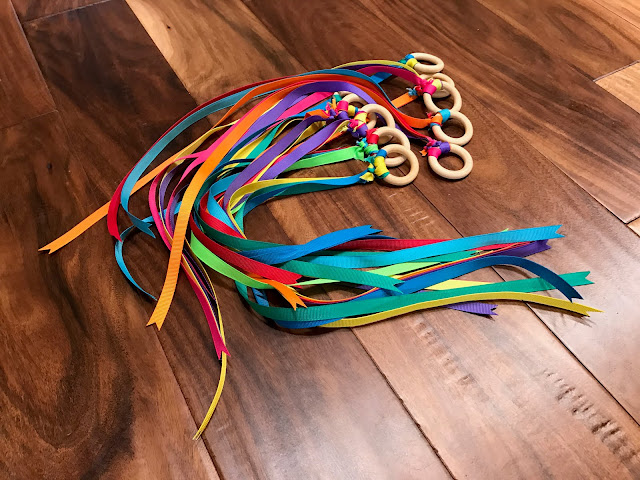
First I started by creating small Waldorf inspired ribbon rings. These are great fun for throwing or dancing with, and I love that they are also an open ended toy. 


Here is my tutorial on how to make them:


Then using supplies purchased entirely from Amazon (read: without even having to leave the house!) I put together these sweet little sketchbooks. 


Here are the products I ordered:


I cut the stickers into strips, sharpened the pencils and used the colorful ribbons to tie it all together in a neat little package.


Then I added even more colorful goodies to the favor bags! Including these items:


And, don't forget the treasure at the end of the rainbow!


Lastly I decided to add just one more treat (not pictured). So, I added two of these fun crystal lollypops to each goody bag.


Then to wrap it all up, I used plain paper gift bags. 


To make them more decorative and unique I packaged them with colored tissue paper, and finished each on of with a rainbow bow. 


Our guests (both boys AND girls!) were delighted with their fun and colorful keepsakes!


Stay tuned for more posts on the fun details of this rainbow party!

That's all, and thanks for stopping by!


Linking up to these fun parties:
http://www.uptodateinteriors.com/2017/03/the-creative-circle-no-107.html
http://staceyembracingchange.com/2017/03/16/creative-inspirations-linky-party-and-features-35/
http://www.artsyfartsymama.com/2017/03/artsy-fartsy-link-party-3.html
http://www.uptodateinteriors.com/2017/03/the-creative-circle-no-106.html
http://staceyembracingchange.com/2017/03/09/creative-inspirations-linky-party-and-features-34/
http://www.artsyfartsymama.com/2017/03/artsy-fartsy-link-party-2.html
http://diyshowoff.com/2017/03/12/diy-party-time-214/
http://www.skiptomylou.org/made-by-you-monday-46/

Wednesday, February 22, 2017

DIY Hand Kites (Ribbon Ring)

It's that time of year again in my household: Birthday season!

Luckily all 3 of my kids' birthdays are two weeks apart, so we are able to have one big celebration for everyone. This year I decided to go with a colorful "rainbow" theme.

For the party favor bags, I wanted to be sure to include a handmade element for each child to enjoy. I love providing children with lovingly handmade things to pay with.


But, there were a few requirements. For one, it needed to be something that I could easily produce and in a short time. Also, it had to go with our colorful rainbow theme and be inexpensive.

So, created small Waldorf inspired ribbon rings. These "Hand Kites" were the perfect addition to our favor bags!
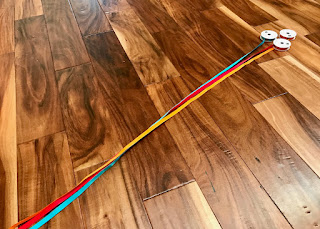
They are great fun for throwing and watching them soar through the air, or for simply dancing around with dancing around with. Plus I love that they are also an open ended toy.


Here are the supplies I used for this project:

Wooden rings:


Clored ribbon. (I used two packs of this to make about 20 rings)


Sharp Scissors 


From there it was super easy to make these!

First:

I chose 3 coordinating colors to use for each ring. Usually I used analogous colors (or colors that are next to each other of the color wheel). Then, I empty an entire spool of ribbon, and cut the length of it exactly in half.


Each (half length) strand of ribbon was the perfect length for one ring. 

Then: 

The next step was super easy too. I looped the ribbon through itself to secure it onto the ring, leaving one side much longer than the other. Then, I pulled it tight. 


To make sure that they held up to rough play, I further tied one end of each ribbon securely onto the wooden ring. Then, I snipped off any access  ribbon (from the short ends) near the knots. 


Lastly:

To dress them up a little, and keep the ribbon from unraveling, By making one diagonal cut, I cut a "v" shape in the end of each ribbon. Sharp sewing scissors make this step much easier.


Simply hold the ribbon between your fingers, pinch it in half and make a diagonal cut across the folded ribbon (pointing towards the wooden ring). Essentially you want to cut out a small triangle.


Lastly, enjoy and share your colorful creations! They are great for tossing through the air, dancing or anything else your imagination can think of.


That's all, and thanks for stopping by!


Linking up to these great parties:

http://www.gingersnapcrafts.com/2017/02/wow-me-wednesday-287.html
http://www.mygirlishwhims.com/2017/02/your-whims-wednesday-295-and-features.html
http://www.savvysouthernstyle.net/2017/02/wow-us-wednesdays-314.html
http://www.colorsandcraft.com/blog/2017/2/share-it-link-party-258
http://thediydreamer.com/from-dream-to-reality/share-crafts-diy-projects-255/
http://www.uptodateinteriors.com/2017/02/the-creative-circle-no-104.html
http://staceyembracingchange.com/2017/02/23/creative-inpirations-linky-party-and-features/


Monday, September 12, 2016

Just Add Color

Latley it seems like there is used patio furniture for sale everywhere!
Summer isn't officially over until the 22nd, so there is still have time to enjoy the outdoors. Luckily, even if it's a bit weathered, used patio furniture is easy to update!

spray painted furniture

First, I gathered up several pieces of worn wicker furniture.


I chose peices that were all made of the same material (wooden wicker). But you could also update multiple pieces of furniture made from different materials as well. As long as you paint everything with corresponding colors, you can mix and match metal, wood, and even plastic furniture. The great thing about the paint that we'll use is that it sticks to just about everything!

If you do go with wicker, check to be sure that it isn't unraveling or broken. Usually the first place you'll notice damage is on the legs. If it's starting to unravel, skip it. But, don't worry about chipped/ faded paint. We will fix that part!


Next, I used 100 grit sandpaper to lightly and quickly remove flaking paint, dirt and spider webs from each piece. Just a quick once-over was enough to remove the worst of it. You don't need to completely sand everything off, just aim for the loose bits.


Now the fun part!

Work outdoors, and cover an area about twice the size of your furniture with a protective surface (to avoid painting your patio too). I like to use old cardboard for this purpose. If you have an "Amazon habit" (like I do) then you probably have no shortage of boxes laying around! But you can also use drop cloths or even old sheets (tip: check your local thrift stores for great deals on sheets!).


Next gather your paint. Here is what I used for this project:

For the largest chair, I used three cans of Rustoleum "Oasis Blue" spray paint. I like the "paint plus primer" (called "2X") because it is durable and easy to use. Wicker tends to soak up a lot of paint, so have multiple cans ready.
If your chair is solid wood or plastic, then you can likely get by with only two cans. 


Next, for the child size rocking chair, I used one whole can of the same brand of paint. This time I used the "Magenta" color. One can was just enough to cover the chair because it was already red.


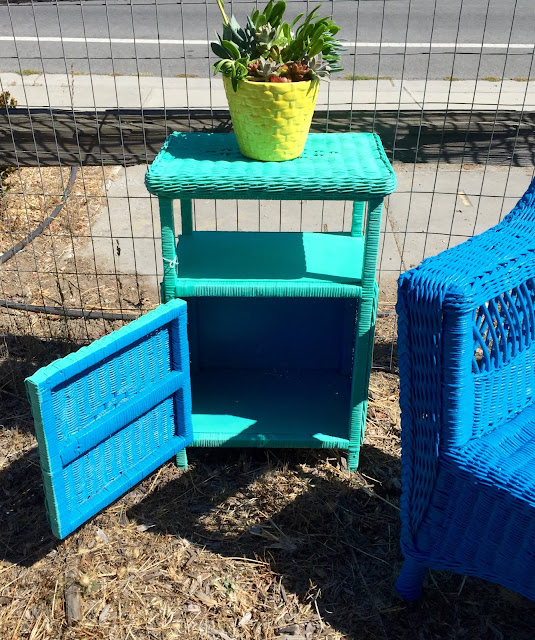
Lastly, I used a different brand of paint for the side table, because I liked the way that the color looked with the other two.
This time I used Krylon Paint and Primer in "Sea Glass".  It took about 3 cans to completely cover piece (inside and out). The coverage wasn't quite as good as the Rustoleum (I had to do one more layer), but the hue looked great with the other two colors I had chosen.


You can use a glossy finish if you like, but I prefer a satin finish. Matte (satin) finishes have a more sophisticated look and tend to hold up better over time.  


I started painting each piece upside down first. To avoid drips, use a quick sweeping motion, holding the can about 9" away from the furniture.  
Starting with the bottom will give you a chance to "feel it out" and get an idea of how to best apply the paint. And, being that the bottom won't really show, painting the underside first tends to be more forgiving of mistakes and/ or drips. Once you feel confident in your technique, flip the chair over and paint the top.  

spray painted furniture

I like to really saturate my wicker furniture with paint, so I added 3 (and in some places 4) coats of paint. Take care to notice if you are getting small areas like edges, corners and legs. It can be helpful to paint each coat from a different angel, to assure good coverage.


spray painted furniture


Once covered in paint, allow your furniture to dry completely.  

spray painted furniture
Spray painted furniture 

For a unique twist, I painted the inside of the table blue, and the outside green. This makes for a fun surprise when the little door is opened.
Add a colorful pot of (easy to grow) succulents to the mix and you will have a fresh set of furniture that's perfect for cheering up any space!  

spray painted furniture

Lastly, at the end of this project my right hand was tinted blue from the overspray. Luckily I have figured out the best way to get any paint off of your hands is to use this product:


It can also help scrub it onto your hands with one of these:


It works like a charm every time, and smells so heavenly!


Before and After

Sometimes I like to use painted patio furniture inside the house for an unexpected pop of color. It's also lovely on a porch, patio or lawn.

Sit back, relax and enjoy!

Before

spray painted furniture
After

That's all for today! Thanks for stopping by, and happy painting!

spray painted furniture
Add caption


Linking up to these fun craft parties:


Saturday, February 13, 2016

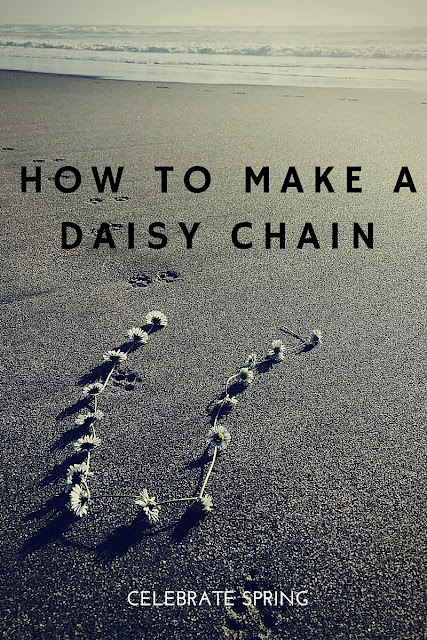
How to Make a Daisy Chain


How to make a flower necklace

Spring is here (or near) and the daisies are blooming!


Nothing says "childhood" like an inviting patch of green clovers, and delicate white flowers.


The next time you come across these sweet signs of spring, try this simple craft.


How to make a flower necklace

First, pick a batch of flowers, trying to select the ones with long stems.


For the next step, I used a pocket knife, but your fingernail can work just as well.


Cut a small slit in the end of one of the stems. Be careful that it doesn't go all the way to the edge.

Next, thread the end of another flower through the hole you've just created. This should feel like threading a needle.


Then, gently pull one stem through the other, until the flower itself stops it from going any farther.

How to make a flower necklace
How to make a flower necklace 

After that, repeat the process over again, making a hole in the stem of the most recently added flower. Continue to do this until you have reached your desired length.


Soon you should have a chain of flowers!

Loop it around your neck, and tie a loose knot in the back.
Enjoy!


These can be made into crowns, bracelets, necklaces and more!


Also, after making these sweet chains, you may want to enjoy the classic book Daisy-Head Mayzie
By Dr Seuss


Daisy Head Mayzie


Thanks for stopping by, and happy crafting!


Linking up to these fun blogs:


http://www.flourmewithlove.com/2016/02/mix-it-up-monday-blog-party-without.html