google-site-verification: googlef2ba99a3ab5aecea.html
Showing posts with label Seasonal Decorating. Show all posts

Thursday, May 31, 2018

Update Your Above Ground Pool


The lazy days of summer are upon us, and I am so excited! It's my very favorite time of year, and a great reason to embark on a fun outdoor project.


Hayley Brentmar

One of summer's greatest pleasures is splashing around in the cool waters of a swimming pool. We can't put in an in-ground pool, so instead we chose to go the "above ground" route.

Unfortunately because of the nature of their design, above ground pools can be a bit of an eyesore!

Not a pretty sight!

However, I was determined to enjoy the fun of having a pool, without the "ugly" factor. So, with a small budget and a creative vision, I was able to transform an ordinary plastic pool into a welcoming tropical oasis.


Here's how I did it:

Start with a framed above ground pool. I did a lot of research and decided on this one:


The price on this pool was great, and the reviews were quite good overall. Plus the size was right. I wanted something deep enough that my kids could still swim underwater, but not too large for our yard. Set up was pretty easy and the whole family had fun putting it together.

Here are the additional supplies I ordered for the pool. I also carefully researched all of these products and have been happy with them.


Start by setting up your pool on level ground. I opted to put a tarp under ours. We simply folded the corners of the tarp underneath the pool during set up so that it wouldn't show.


First things first... Cover up that ugly plastic side of your pool!

To disguise the sides, I wrapped our pool in inexpensive willow fencing. This is the kind I used:


I ordered it in the 4ft height. Don't be scared off by the reviews of this! Yes, it is true that it is pretty flimsy and see through. But that is easily solved!

First of 3 layers

To compensate for the quality, I ordered enough rolls to go around the circumference of my pool 3 times. When you layer this fencing it looks great! It was also easy to secure using brown zip ties. 


The fencing was a little taller than the edge of the pool, so I went around and trimmed off the top using a pair of garden sheers. But, any heavy duty scissors would work.

Next:

I decided to add some color and cheer with flower pots.
Because buying new glazed pots wasn't in my budget, I got creative. I gathered a group of large mismatched planters and decided to give them a colorful makeover.

Before

First, I covered them completely (inside and out) with a layer of primer. The primer will help block moisture and aid in protecting the pot's color from the elements.

During


This project took just under two cans of primer. I applied thick layers and let them dry for a couple of hours.

Then I chose a variety of colors in a cheerful palette. I mixed and matched different brands of spray paint and was sure to select paints formulated for outdoors.


Then it was time to paint the pots! Most of them took at least two coasts of paint. Then for good measure I covered each one with an additional protective clear coat.  I was thrilled with how well they turned out!

After

Then it was time to add the fun stuff!

I LOVE flowers and plants, and I had a wonderful time selecting things to go in these pots. While shopping for plants I was careful to keep my color theme in mind.
I also wanted to add some plants that looked "tropical". Unfortunately were we live it can drop below freezing in the winter, so I can only use cold hardy plants. Luckily there are some tropical looking plants that can stand the cooler temperatures. Here are some ideas:

-Agapanthus
-Cannas
-Cold Hearty Banana Plants
-Cold Hearty Queen Palms

Hayley Brentmar


Don't forget to add a fun garden trinket or two! These worked perfectly for me:


Hayley Brentmar


For a soft landing and to help keep debris out of the pool, consider using a door mat on the ground at the entrance to your pool.

Add in a few more fun accessories and you'll be ready to swim! Here are a few more ideas:

Keep cute towels handy and dry with nearby hooks. I found both in my color scheme on Amazon.


Because the fencing can be a bit rough and because I wanted my kids to be able to get into the pool without help, I also added this small ladder.


It's super easy to take in and out as needed, and luckily it comes in a subtle gray color.


Hayley Brentmar


And don't forget to add some fun pool toys!


Lastly, I updated our old picnic table to match the rest of the decor. Please stay tuned for a "how to" tutorial post about this project soon!


Hayley Brentmar


Hayley Brentmar


Thanks for stopping by; I hope you summer is off to a great start!


Hayley Brentmar


Thanks for stopping by!


Linking up to these fun parties:
http://www.simplysweethome.com/2018/05/friday-favorites-linky-party-week-427/
https://www.chiconashoestringdecoratingblog.com/2018/05/flaunt-it-friday-405.html
https://thecharmofhome.blogspot.com/2018/05/home-sweet-home-370.html
http://www.meetourlife.com/2018/06/nifty-thrifty-sunday-337/
http://www.thepinjunkie.com/2018/06/pin-junkie-pin-party-268.html
https://www.coffeewithus3.com/pretty-pintastic-party-212/
https://easypeasypleasy.com/2018/06/07/funtastic-friday-link-party-182/#more-4285
http://www.annanuttall.com/anna-nuttall-bloggers-links-up-88/
http://www.answerischoco.com/2018/06/bff-open-house-link-party.html
https://lifewithlorelai.com/2018/06/07/fathers-day-ideas-dad-hm-187/
https://www.pamspartyandpracticaltips.com/2018/06/dare-to-share-317.html
http://www.ourminifamily.com/2018/06/our-mini-linky-party-week-179.html
http://piecedpastimes.blogspot.com/2018/06/saturday-sparks-link-party-274.html
https://www.thesitsgirls.com/sharefest/june-8th-saturday-sharefest/
http://www.create-with-joy.com/2018/06/inspire-me-monday-week-336.html
http://jembellish.blogspot.com/2018/06/a-round-tuit-418.html
https://mypinterventures.com/sentimental-diy-fathers-day-gift-ideas/
https://www.themodestmomblog.com/modest-monday-and-a-link-up-229/
http://www.lifeoffaithblog.com


Saturday, February 24, 2018

Grow Real Easter Grass!


Try growing your own Easter grass this year. Right now is the perfect time to get started!


For the tutorial I wrote about this click:

 Here


Thanks for stopping by!


Thursday, August 18, 2016

How to Make Drip Castles

Summer is almost over! We have been enjoying soaking up those last rays of warm sunshine, and spending as much time as we can outdoors! One thing we enjoy doing, both at home and on vacation, is going tho the beach and playing in the sand.

how to make drip castles

Growing up in San Diego, one of my favorite things to do as a child was go to the beach and build drip castles. I still remember the day my mom first showed me the simple magic that is a drip castle!

how to make drip castles

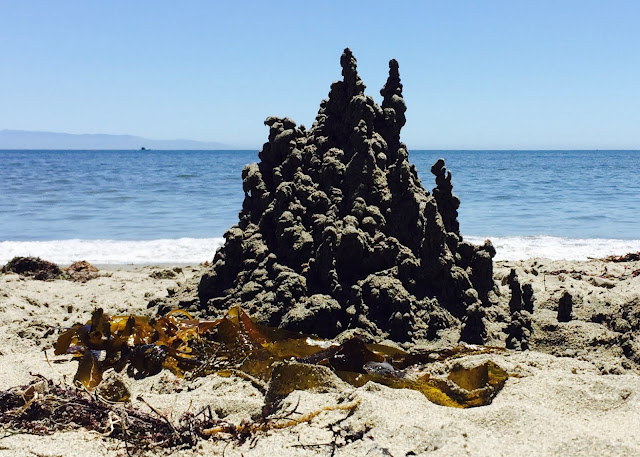
Drip castles rise from the shore like mythical mermaid mansions. But, they are also really easy to create! I've tried making these with (backyard) sand box sand, and it doesn't work as well. I'm not sure if you need the salty sea water, or the fine beach sand, but for some reason I've only been able to make these at the beach.

To start, make a regular sand castle (just a pile if damp sand). This will be your base.


Usually about a foot will be tall enough. But you can make your castle as elaborate and large as you want to!


Next fill a container with ocean water. We've had this little sand play set for years, and love it!


Next, add some sand to the water in your bucket. I usually fill it about 3/4 full of sand. You'll want to keep it VERY watery.


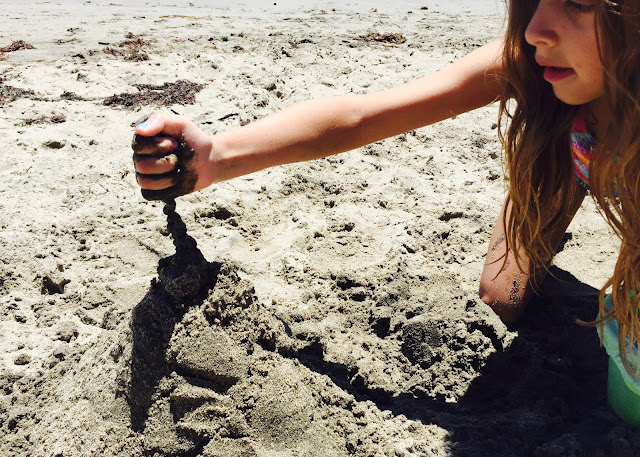
Now comes the fun part! Dip your hand into the water and grab a handful of sand. You want it to be very drippy. Then quickly (before too much of the water drains out) drizzle the sand onto your castle.

how to make drip castles

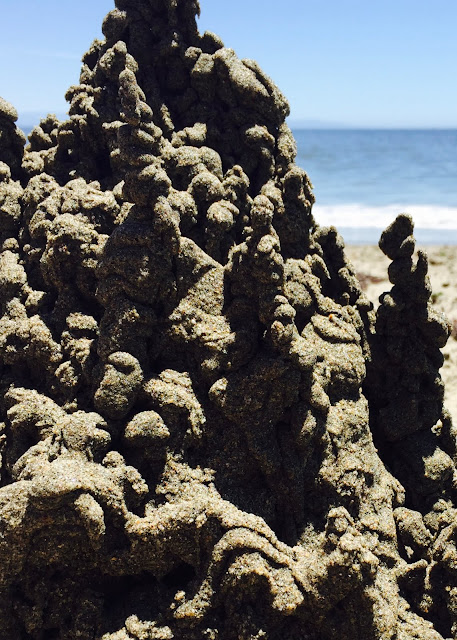
After a few seconds, the sand in your hand will become dry, and start to clump. That's when you know to go back for a fresh scoop. Eventually, you will notice the sand begin to pile up on top of itself, creating and otherworldly formations.

how to make drip castles
Add caption


Play around with moving your hand slowly to the side, and keeping it in one place. You'll discover that you can create a variety of shapes and towers!

how to make drip castles

It's fun to see how tall you can make them! Sometimes it can also be fun to add a few "guard towers" on the flat part around your castle.

how to make drip castles
Add caption


Sometimes, if we are very careful, we are even able to make small holes, tunnels and bridges!

how to make drip castles

If you stay at the beach long enough, eventually you'll notice that even once your drip castle is dry, it will still retain it's shape!
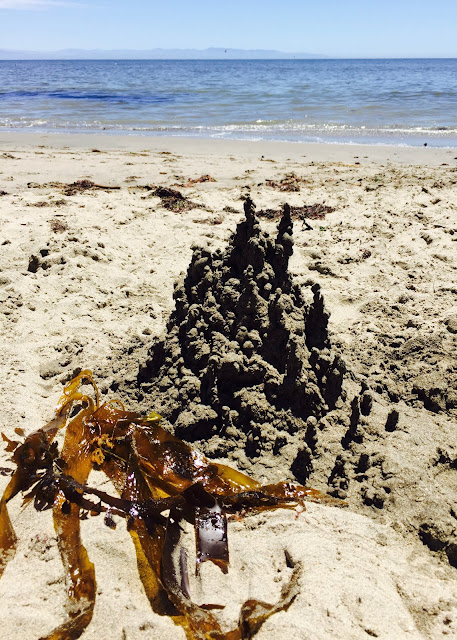
Encourage mermaids and other sea creatures to visit by embellishing your castle with found objects. Things like kelp and shells work great for this!

how to make drip castles
Add caption

Sit back, soak up the sun, and enjoy your handiwork!

how to make drip castles


That's all, thanks for stopping by!


Linkning up to these fun parties:

http://livelaughrowe.com/vegetable-side-dishes/
http://www.artsyfartsymama.com/2016/08/artsy-fartsy-link-party-3.html
http://staceyembracingchange.com/2016/08/18/creative-inspirations-linky-party-and-features-10/
http://www.posedperfection.com/2016/08/creative-ways-link-party-119-and.html
http://tidymom.net/2016/homemade-after-school-snack-recipes/
http://www.oneprojectcloser.com/creativity-unleashed-link-party/
http://www.mysuburbankitchen.com/2016/08/pinworthy-projects-party-162/
http://dianarambles.com/2016/08/pin-linky-party-203.html
http://www.avisiontoremember.com/2016/08/the-creative-exchange-august-18.html


Saturday, February 13, 2016

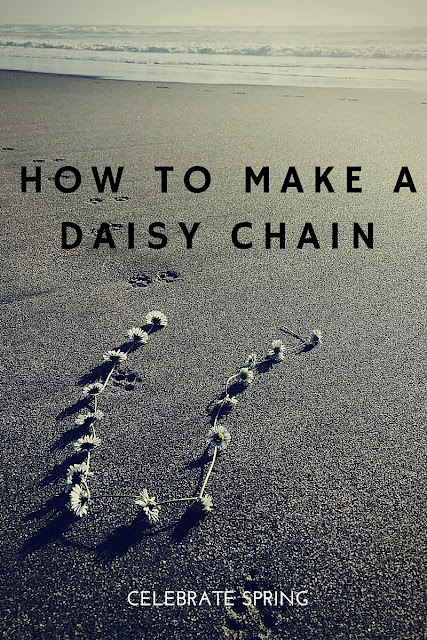
How to Make a Daisy Chain


How to make a flower necklace

Spring is here (or near) and the daisies are blooming!


Nothing says "childhood" like an inviting patch of green clovers, and delicate white flowers.


The next time you come across these sweet signs of spring, try this simple craft.


How to make a flower necklace

First, pick a batch of flowers, trying to select the ones with long stems.


For the next step, I used a pocket knife, but your fingernail can work just as well.


Cut a small slit in the end of one of the stems. Be careful that it doesn't go all the way to the edge.

Next, thread the end of another flower through the hole you've just created. This should feel like threading a needle.


Then, gently pull one stem through the other, until the flower itself stops it from going any farther.

How to make a flower necklace
How to make a flower necklace 

After that, repeat the process over again, making a hole in the stem of the most recently added flower. Continue to do this until you have reached your desired length.


Soon you should have a chain of flowers!

Loop it around your neck, and tie a loose knot in the back.
Enjoy!


These can be made into crowns, bracelets, necklaces and more!


Also, after making these sweet chains, you may want to enjoy the classic book Daisy-Head Mayzie
By Dr Seuss


Daisy Head Mayzie


Thanks for stopping by, and happy crafting!


Linking up to these fun blogs:


http://www.flourmewithlove.com/2016/02/mix-it-up-monday-blog-party-without.html

Sunday, February 7, 2016

Late Winter Flowers


The trees are still bare, and there are crisp dry leaves rustling in the corners.


But, the signs of very early spring are starting to show. The winter flowers are blooming!


The prehistoric looking blooms of a Witch Hazel plant are some of the first flowers to emerge after the frosts have ended. These spidery flowers are a mysterious delight.


Next, small Crocus flowers appear amongst the frozen twigs and remnants of Fall's last show.


I wasn't sure if these small sweet (tried and true) winter flowers would even grow in California. But, last year I ordered a few bags of bulbs anyway. Much to my delight the grew!


They are subtle and delicate, but glimpses of color bring the promise of great things to come.


Another welcome peak of color comes from Primroses. They peak out from empty flower pots, offering vibrant glimpses of color.


I love walking out into my garden to find these first signs that winter is nearing an end. 


Primroses are reliable winter flowers. They die down in the scorching heat of summer, but return reliably late every winter.


The primroses are echoed in vibrancy by the delightful blooms of my reliable Christmas Cactus.


This winter beauty is hard as nails and brings joy every year, even in the dreariest of months.


Camelias are another "sure fire" late winter flower. Mine thrive on a partially shaded hillside.


The low light of late winter ignites winter blooming flowers, making them simply glow. Nature seems to just know how to highlight these beauties, even in their subtly.


Even evergreens, ferns and (the surviving) succulents glow in the cool low light.


Purple Happy Wanderer Evergreen twining vine thrives in a corner of my patio.


This winter flower can live in sun or shade. It has clusters of purple flowers in winter.


Like many winter flowers, this vine is relatively small in stature. It only grows to 10' tall.


Even though it is not yet Valentines day, promises of warmer weather are starting to peek through.


Velvety Pansies and Violas bring cheer to empty corners.


The winter garden is filled with the enchanting scent or Winter Daphne.


This small delicate winter flower unleashes an intoxicatingly sweet aroma, a welcome sign of the spring days ahead.


Thanks for stopping by, and happy gardening!


Linking up to these fun blogs:

http://thefoleyfam.com/2016/02/sunday-funday-link-up-144-features.html
http://www.thecasualcraftlete.com/2016/02/07/the-creative-gallery-166/
http://www.sewcando.com/2016/02/craftastic-monday-link-party.html
http://thediydreamer.com/from-dream-to-reality/show-off-your-creations-204/