google-site-verification: googlef2ba99a3ab5aecea.html
Showing posts with label living room. Show all posts

Tuesday, June 9, 2015

Chair Redo

When we bought our house, we also purchased some of the furniture from the previous owner. Included, was a pair of living room chairs.


At first glance they might not look like anything special. The cushions were saggy and the fabric was worn. But, I could tell that they had interesting lines and a lot of character.


It was time to recover! Since we have little kids I knew I'd need something durable. I also knew that I needed to find a fabric that would go with our (not so pretty) *green carpet.

*Please stay tuned for a future post about how I made the mint green carpet work!


Knowing that prints hide stains better than solids, I chose a pattern that included several shades of grey. For durability I decided to use and indoor/ outdoor fabric. The pattern I chose is called:

A New Twist Geometric Stripe Outdoor Fabric Caviar

I purchased A New Twist Geometric Stripe Outdoor Fabric Cavia locally here. But, the good news is that this store also does mail order!


Also, to add a bit of punch, first I spray painted the legs red.
Since I knew I'd be replacing them both, I didn't bother to protect the upholstery or the old deck.


Then, since I am NOT a seamstress, I hired a local company to recover the chairs for me. They did a beautiful job (but it wasn't cheap).
To be completely honest, in the end I probably spent about the same amount of money re-doing these chairs as I would have had I bought new ones. The advantage was that I was able to completely customize them. Finding furniture to work with the awkward green carpet is a challenge, so it was helpful to design them myself.
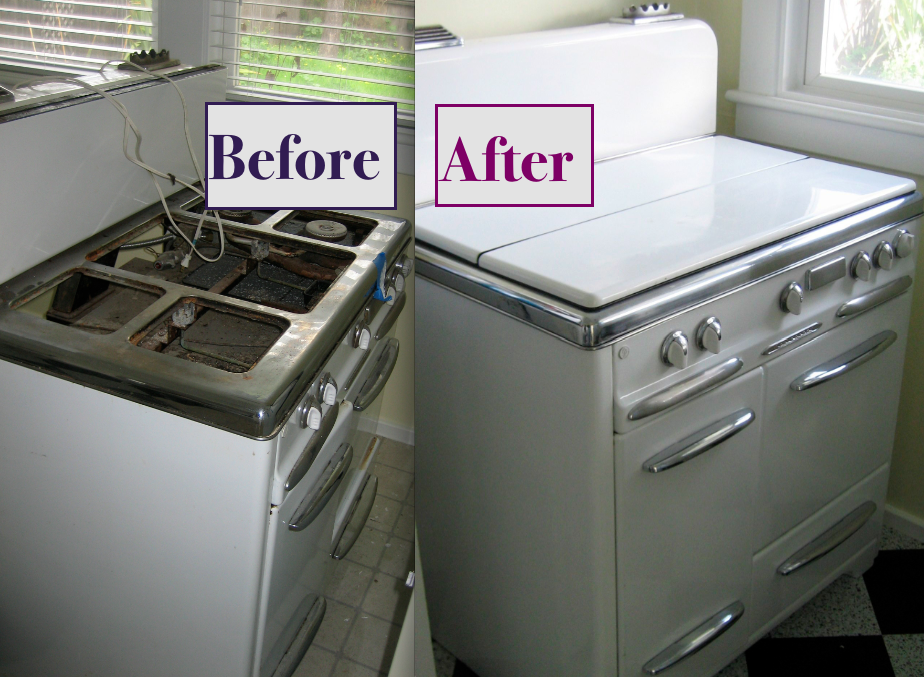
Before

After

This was one of the (few) projects I've chosen to highlight on my blog that didn't involve much DIY time. But since these chairs were still a result of my personal creative vision, I decided to show them off here anyway :)

Thanks for stopping by!


Linking up to these fun parties:

http://ladybug-blessings.com
http://www.posedperfection.com/2015/06/creative-ways-link-party-57-and-features.html
http://www.acreativeprincess.blogspot.com
http://www.mustlovehome.com/friday-favorites-272/
http://www.elizabethandcovintage.com
http://www.kitchenfunwithmy3sons.com
http://akadesign.ca/weekend-retreat-link-party-123/
http://www.jugglingrealfoodandreallife.com/2015/06/lets-get-real-friday-party-94.html
http://www.create-with-joy.com/2015/06/friendship-friday-blog-party-social-media-boost-176.html
http://www.frenchcountrycottage.net/2015/06/feathered-nest-friday_11.html
http://domesticsuperhero.com/2015/06/12/pinworthy-projects-link-party-70/
http://www.thepinjunkie.com
http://www.dearcreatives.com/linky-party-inspiration-spotlight-linkup-148/
http://diy-vintage-chic.blogspot.com/2015/06/fridays-five-features-no-94.html
http://designsbygollum.blogspot.com
http://www.xoxorebecca.com
http://www.justusfourblog.com/2015/06/pinworthy-projects-party-103/#
http://www.shakentogetherlife.com/2015/06/creativity-unleashed-link-party-giveaway.html
http://www.dianarambles.com/2015/06/pin-me-linky-party-141.html#


     style="display:block"
     data-ad-client="ca-pub-1259762351787524"
     data-ad-slot="8522386894"
     data-ad-format="auto">

Tuesday, June 2, 2015

Easy Summer Decor

I know it's not officially summer yet. But, the kids are out of school, and we're all ready for summer to start!


So, I decided it was time to pack up my spring decorations and create some new ones for summer. After the frills and flowers of my spring decor, I really wanted my summer decorations to be clean, light and simple.
Because it was easy and quick, I went with a beach/ nautical theme.

One of the first things I did was dress up some glass vases with jute rope. I found my rope at the craft store, but you could probably find it for less at a hardware store.


Then I simply hot glued the rope around the base of each vase.


I wound the rope around the vases, gluing as I went. This was vey easy and quick.


This could be used on a multitude of glass containers. You could use interesting bottles, mason jars or even inexpensive cups.


Then, using this tutorial as my guide, I created a beachy monotone wreath.


This turned out to be very time consuming, and (for me personally) dangerous! While cutting a stack of fabric, I slipped and cut my finger with my sewing scissors. Four stitches later, I'm here to tell the tale.
So, please be careful!


I used 3 old sheets (from the goodwill) for this project. They weren't exaclty the same color. So, as one shade of white neared the next I began "blending in" pieces of the next shade. That way they would fade into one another. This project took a total of 1000 dressmaker pins.


And: 1 white foam wreath.

Then I made another wreath for our front door. This one went much faster!


This was just plain brown paper (folded into thirds), wrapped and then hot glued onto a styrofoam wreath. I have a big roll of brown paper that I use for all kinds of things.


 (if you don't want that much paper, here is a smaller one, or you could even use grocery bags).


The shells and driftwood are from the craft supply store (or you could just find some at the beach!).

While at the craft supply store, I saw these plain wood blocks. I love using natural materials, and wanted to work them into my summer decorations. So, I just decided to paint letters on them, and to spell out "summer". Then I added them to my display them on the mantel.


I freehanded the letters using acrylic paint (titanium white). Then to bring out the woodgrain I polished them using my homemade Beeswax polish.

Then I went around the house gathering things that were beach related or matched my grey/ light wood pallet. I arranged them on the mantel.


The large mirror came from Target (similar color framed mirror).

I have a big glass bowl that I also like to change with each season. For summer I decided to make it into an "under sea" scene. I decided to fill it with some sand (from the kids sandbox out back!), shells, coral, artificial succulents and driftwood. If I can find a way to add "fish" (without it looking too hokey), I'd like to do that too.


I used a round rope mirror (similar) as a backdrop, and added a pair of fake plants from Ikea in a grey-green tone.

Then came to really easy part! If you're not a crafter, this is one thing you can do to add a summer decorations without having to make anything! I just took some more shells and scattered them through the house.


I sprinkled them onto shelves and in bookcases.
*Also something to note... I like to organize my books by shape and color.


I even tucked them into this wreath.


Then, I combined shells with interesting worn wood. For similar wood, try your pet store's reptile supply section. This particular piece was meant to go in a lizard's cage!


Or, an online supplier of natural materials is save-on-crafts. They have great prices (but will get you on the shipping, so check to see if they have a location near you where you can pick up your order).

That's all!
Thank you for stopping by, and have fun with your summer decorations!


Linking up to these fun parties!

http://ladybug-blessings.com/?p=5823
http://romantichome.blogspot.com/2015/06/summer-decoration-show-and-tell-friday.html


     style="display:block"
     data-ad-client="ca-pub-1259762351787524"
     data-ad-slot="8522386894"
     data-ad-format="auto">

Friday, May 29, 2015

Living Room Makeover


It's flashback Friday here at Leaving the Ivory Tower. Today, we're traveling back in time to when we bought our first house. This tiny 900 square foot beach bungalow was the cheapest home in town, and it showed!

The home had been a rental for college students, and had seen her fair share of parties. But, we saw that she had "good bones" and great potential.

It took a little (actually a lot) of TLC, but eventually she shined and was even featured on national TV!


beach bungalow


Today we're stepping into the living room for a details about the changes we made there. Join me for a "budget friendly" living room remodel!


Before


Sadly neglected, this foreclosure had seen better days.  Carpets were stained, windows were broken, and there was even a crack-pipe laying in the (weed covered) yard.

But, we saw that despite the neglect, she still possessed many of her subtle charms.  An archway lead to the dinning room, and thick wood trim still lined the windows.

The carpet was covered with burn marks, beer stains and who knows what else!


Carpet, before


Carpet, before


Can you tell where their couch was?!


Living room floor, before


We suspected there might be good things hidden underneath that gross carpet. So, one of the first things we did was pull up a corner of the carpet (it was actually only a few years old!).

Much to our delight, we discovered the original heart Douglass Fir wood floors hidden underneath!  

This is often the case in older homes (this one was built in 1928).  So if the carpet is in poor condition, like this was, see if you can sneak a peak underneath.  It's easy to (inconspicuously) pull up a corner to look.

Original wood floor, before


We knew the wood floors would need refinishing, so I quickly started painting the walls.  When "flipping" a room, it's best to work from "top to bottom" (starting with the ceiling).  This way I didn't have to worry about dripping paint on the floor, because I knew it would just get sanded off during the refinishing process.

Because I like bold color, and because the style of the home lent itself fun choices, I went for a bright cheerful green for the walls.  It was essentially the color of wasabi!


Wasabi Green!


Next, I painted the 4th wall (the one with an open arch leading to other rooms) white.  Because I wanted a crisp clean look, I just used the standard out-of-the-can "ultra pure bright white".


Then, it was time to refinish the floors. This was one of the things we splurged on. We brought in a professional. You can rent a sander and do this job yourself.  But for DIYer's (like us) I wouldn't recommend it because upright sanders can be tricky to control.


Floor refinishing process


They sanded through old floor, old finish and replaced a few rotten boards.  Even though they draped the house in plastic, this still made a HUGE mess.  There was a fine layer of sawdust everywhere!


Wet finish on floors


Also, note that the finish they put on the floors has a very strong chemical smell that lingered for a couple of days. We were living there, and I was pregnant, so it was not pleasant. If you can, stay away during this time!


Before


After


To hide some of the flaws that remained, and because I like to look, I chose the darkest stain available.


Then it came time to add furnishings and decor...


Before


After


Because the room was so small, we opted for a red love seat (purchased from a local furniture store) in place of a full sized sofa.  Red and green are complementary colors, so this worked well with the vibrant walls.  Also, smaller scale apartment sofas, are perfect for small spaces.

We also hid our TV inside of an armoire, and used a storage trunk as a coffee table.  In a small house it's important to add storage wherever you can!

Simple sheer white curtains, a dark brown club chair, my own painting and a DIY suitcase table finished off the look.


After


After


I spray painted an ornate hand-me-down mirror red, and we added some sturdy wood shelves from Ikea.

We played around with how the furniture was arranged, and switched around accents.  It was fun to be able to make these small changes.

Overall we were so happy with the end result! Instead of having a a living room that was dreary and depressing, this little house suddenly had one that was bright and cheerful!


Before


After


When we were selling this house we had a neat surprise. The day after we accepted an offer, this house was featured on the Today Show! We still don't know how they found us. But is was pretty cool be be selected and featured on a national TV show, even if it was a day too late to help us with the sale!


Here is the link to watch the Today Show Segment.  There is a short ad.  To see our house featured fast forward to the 1 min 13 second mark.


It was pretty funny to hear Al Roker commenting on my "strong art" (a painting I made in college), and to hear the comments about how there should have been "chunky red cookie jars" in the kitchen... which there were, 3 of them, just off camera!


For more about this house, and our complete bungalow remodel, please stay tuned for future posts. 


Thanks for stopping by!


Also, to see more of the drastic changes we made in this home, please enjoy these other posts as well:


Linking up to these fun parties:

Friday, August 29, 2014

Living Room Re-do

Much like the rest of the house (see Retro Range Redo and Budget Bathroom Remodel) this room was quite a doozy. Perhaps more than anywhere else, it was obvious that this poor little house had served as party central for a number of years.
But, we were able to see the hidden charms and resurrect it. I knew the second I opened the door and saw the archway in the living room, that this little bungalow had a lot of potential.

Welcome!


It was a long time dream of mine to own and fix up a sweet little beach bungalow. Early in our marriage got the opportunity to do just that!
This is another post in the series detailing the changes we made to our first home. Today we'll visit the living room.

New Paint

The walls, ceiling and trim were all were painted a cold drab white. They were filthy and desperately in need of new paint.


Instead of gloom and doom, I wanted something bold and cheery. My friend later called the color I chose "wasabi green". I think it was an accurate description! 


But, I didn't use the green color everywhere. I wanted to highlight the architectural interest provided by the arch, so I painted some walls white. In order for it to work with the bright colors, I used off-the-shelf basic white. It's usually called "ultra pure white". If used alone, this white can look sterile. But when paired with bright vivid colors, it works well. 

Fixing the Floors 

When doing a room rehab it's best to start at the top (literally, the ceiling) and work your way down (to the floors).  So, the next step was fixing the floor. This carpet was relatively new, but it had seen one too many parties. 

"Before"

The poor carpet was covered with beer, burns and bong water. As you ca see, the only clean spot was where the couch must have been! 

Before


We had a "Eureka!" moment when we pulled up a corner of the carpet, and found the original fir floors underneath. They were made of heart wood and original to the house (built in 1928). Hallelujah!  We pulled up the old carpet and got to work!
There were a few places that needed repairing and patching. Also, I pried off all of the old carpet tack strips. 

Then the "real fun" began. Sanding!


Wow, sanding down a wood floor makes SUCH a mess! If you ever do this take everything you can out of the house. You'll be finding sawdust everywhere for months!
You can rent a sander and do this yourself if you want to. There are many great tutorials on how to do this. 
Sanders are large and awkward. Plus it can be tricky to get it just right. Proceed with caution, or hire a professional. 


For the most part the floors were beautiful, but there were a few places that still showed some damage. Because I like the unique aesthetic of dark wood, and because I wanted to hide the flaws I chose the darkest stain I could get.
Everyone though I was crazy, going with the darkest stain I could find. But just I went for it, with no hesitation, and it turned out great! 


We were so pleased with the result. The floors turned out beautiful!


When we were selling this house we had a neat surprise. The day after we accepted an offer, this house was featured on the Today Show! We still don't know how they found us. But is was pretty cool be be selected and featured on a national TV show, even if it was a day too late to help us with the sale!


Here is the link to watch the Today Show Segment. Unfortunately there is a short ad. To see our house you can fast forward to 1min 13 sec.


It was pretty funny to hear Al Roker commenting on my "strong art" (a painting I made in college), and to hear the comments about how there should have been "chunky red cookie jars" in the kitchen... which there were 3 of them, just off camera!


Here are a few more "before and after" shots:


Before
After
Before
After


Thanks for stopping by!

Linking up to these great parties:
http://tidymom.net/2014/simple-diy-projects/
http://www.shabbynest.blogspot.com/2014/08/frugal-friday_28.html
http://www.simplysweethome.com/2014/08/friday-favorites-week-232/
http://kitchenfunwithmy3sons.blogspot.com
http://www.bacontimewiththehungryhypo.blogspot.com/2014/08/anything-goes-linky-169-treatment.html
http://www.trulylovelyblog.net/2014/08/fancy-this-fridays-191/
http://thegrantlife.com/life-party-52/
http://www.oneprojectcloser.com/creativity-unleashed-link-party-8/
http://new.inlinkz.com//luwpview.php?id=440719
http://lollyjane.com/creative-collection-group-link-party-15/
http://chiconashoestringdecorating.blogspot.ca/2014/08/flaunt-it-friday-221.html
http://www.thirtyhandmadedays.com/2014/08/party-bunch-week-45/
http://www.dianarambles.com/2014/08/pin-me-linky-party-100.html
http://www.craftberrybush.com/2014/08/the-inspiration-gallery_28.html
http://www.frenchcountrycottage.net/2014/08/feathered-nest-friday_28.html
http://www.notjustahousewife.net/2014/09/september-linky-party-2014.html