I am very inspired by Waldorf education. Part of the Waldorf theory is that children should be surrounded with natural materials. Waldorf purists don't have any plastic in their children's spaces. While I'm not that strict with it, I do try to limit junky plastic toys as much as possible.
Unfortunately I found that there aren't a lot of commercially available options for natural outdoor play equipment (at least not economical ones). So, this led us to create an outdoor play space largely ourselves.

We were lucky that the sand area you see in these photos was already here when we bought this house. But, besides a crumbling old fence, there was nothing else. It was a blank slate!
 In my effort to avoid big colorful (plastic) play structures, we were led to build our own.
 Amazon sells ready made brackets. They are nice because you can make the swing set as tall and wide as you want to, and customize it for your space. Here is a link to the ones we used:
All of the commercially available swings I could find were made of brightly colored plastic or rubber. Since I was trying to avoid that aesthetic, I decided to go a different route and use wooden swings.

I ordered these traditional wooden swings from here. It was the best price I could find for them. There are also some for sale on Etsy, or you could make one yourself.
We added extra length in the top cross beam of the swing set, on the side. This enabled us to add a rope and wooden rope ladder for climbing (see detail photo above).

Create Hiding Places
Kids love to have places to hide, places to be alone and to experience their own sacred space. We created two small areas for them to get away from it all, and be alone. The first was this ready made canvas teepee. It is made for indoors or outdoors, and so far it has held up well.

The second hideaway my husband build himself. The base of it was actually one of our old kitchen cabinets left over from a remodel!

Make use of any old wood you have, or unused house parts, and get creative!

This little house could be a play area all on it's own! There are lots of extras to keep little ones entertained. On top there are 3 Dollar Store butterflies, spray painted with Rustoleum's Oil Rubbed Bronze paint (I love this stuff and use it all over the place!).
On the side there I also added a small wind chime, that has become "the doorbell".
To see the kitchen it came from go Here :) Or, to see how I originally worked this into a tiny yard playspace, go Here.
Inside the house I mounted a wooden box, to act as a shelf for trinkets and treasures. It's a leftover from a Melissa and Doug toy set.


On the outside of the house, a small shelf holds a real mailbox (an easy find at most hardware stores).


Logs To Climb On
When we took out an old hedge in the front yard, we noticed that many of the shrubs had usable logs. We saved them, and eventually I used them to create this small climbing structure.

First, I used three of the longer logs to make a pyramid shape. I screwed them together with deck screws (and an electric drill).
Then I used the longest three logs to make the horizontal bottom rung of each side. I worked my way up to the top of the pyramid using shorter and shorter logs, and finally added vertical cross pieces for extra strength.

Lastly we trimmed off any extra length, and used an electric sander to round off sharp edges.

Also, it is importand to be mindfull when screwing the logs together. You don't want to have the sharp end of any screws poking out the other side of the logs.

In my continuing quest to use natural materials, I decided to utilize the pieces of an old tree that someone had left at the bottom of our yard.

I was fortunate to have these logs just lying around. But you could also contact a tree service company and ask them for spare parts, or keep an eye (and ear) out for anyone doing tree work in your neighborhood.

 I dug down into the sand about a foot and buired each log, being careful to keep the tops level. This created a raised stepping area. It is great for building balance and coordination!
With another log, I created a wooden ramp for balancing. I laid the log on its side and used two old boards to create the balancing/ walking surface.

Using an electric drill and deck screws, it was simple to attach the boards to the log.

Add a Place for Art
After growing tired of having sidewalk chalk drawings on every single surface in our yard, I decided we needed a dedicated drawing space!
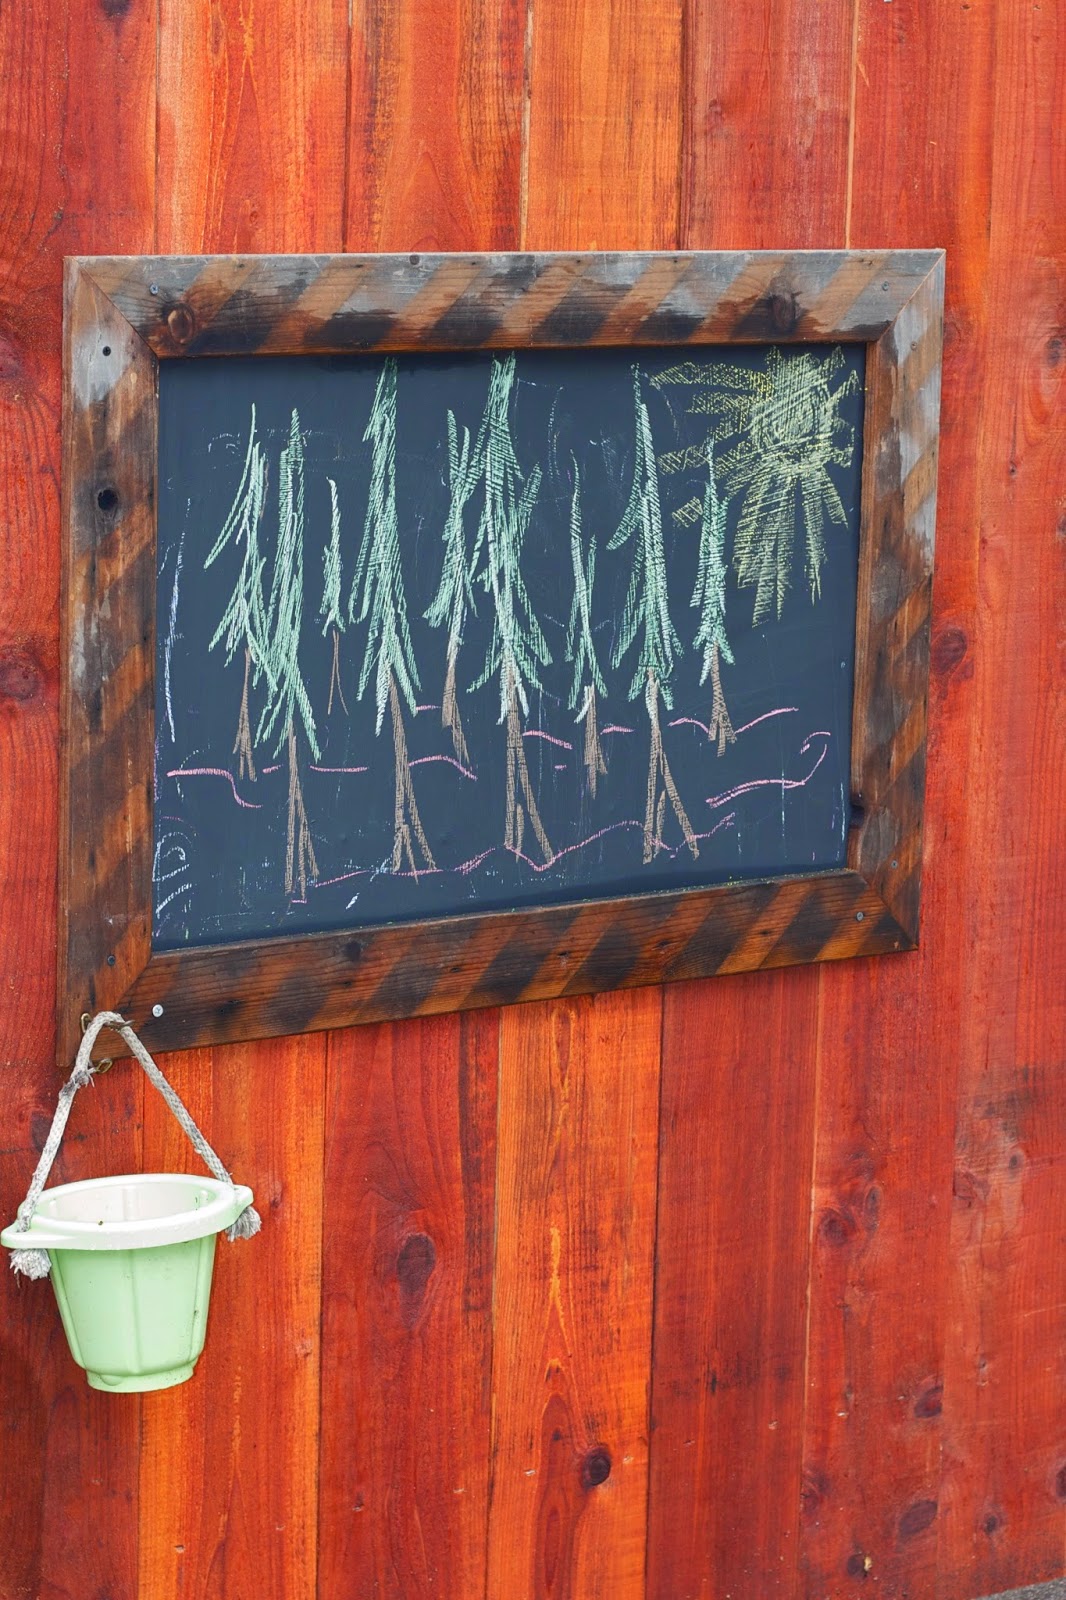
This chalkboard was simple to make. First, we had a piece of sheet metal cut at the hardware store. Then I used some of the leftover chalkboard paint from our kitchen re-do and painted several layers directly onto the metal.

Because the edges were very sharp, my husband used some old boards we had laying around to create a frame for the chalkboard.

Lastly, we mounted it onto the fence (at child height) and added a hook and bucket for holding the chalk. Once it stars raining I'll probably take the bucket down, but you could also drill some small holes in the bottom for drainage.
Loose Parts Play
Another great element to add to your outside space, is a collection of loose parts for creative play.

 Whenever I find an interesting piece of something, I add it to our collection. We have pieces of wood, and bits of moss, and other interesting natural materials. You could also incorporate things like: shells, rocks, and pinecones. Left to their own devices, kids will use these spare parts in all kinds of creative play.
A true Waldorf purest probably wouldn't have these trucks or small rubber figures in their collections. But, I find that they are also great catalysts for creative and imaginative play.

 I purchased these old metal Tonka trucks on eBay (the new ones are expensive, and have a lot of plastic parts). The toy dinosaurs were found for free on the side of the road! Hurray for free toys!
If you have sand or dirt, provide tools for digging. Instead of ready made plastic sand toys, look for interesting kitchen items, and gardening tools.
Much of our collection of wooden and metal tools came from second hand stores (like the Goodwill) and the Dollar Store's kitchen section. I found the child sized rake and broom at a nursery. Or you can purchase a similar set like this.

Wooden baskets make great storage containers, and there are always plenty of them available at low prices at the Goodwill or other second hand stores.
Add Growing Green Things
Part of the magic of outdoor play is being amongst growing things and nature. Wherever possible, add (non toxic) plantings.

One side of our sand area is dedicated to plantings. A redwood bark path wanders through a small garden, and over a wooden bridge.
This area is meant to be child friendly and inviting.

I was also happy to discover that there was good soil buried about a foot under the sand in our yard. Because of this, I was able to plant a winter flowering Witch Hazel tree directly into the corner of the sandbox.

 Also pictured, is the one piece of plastic play equipment that we have. It is a Craigslist plastic slide, that I spray painted a natural tan tone. Originally it was a loud obnoxious color. I'm still searching for a good natural materials slide option!
We are also so fortunate to have this large majestic Live Oak tree towering over our play area.
Its twisting branches provide shade, and are home to animals such as birds and squirrels. We love watching them go about their days.

It also provides us with an endless supply of acorns for creative play!
Add Mystery and Wonder
In addition to play equipment, carefully placed garden trinkets can add wonder to your play space.


I bought the quirky red birdhouse from this Etsy seller. We left one of the fenceposts long, and mounted the birdhouse high above the play area.

A hook meant for hanging plants holds a bird feeder and wind chimes. We love to fill the feeder with peanuts, and watch the squirrels and blue jays quickly devour them. The wind chimes provide a magical auditory element.
A big part of incorporating nature is embracing it's creatures. We love to feed all the critters who live in our yard, and we recently added this squirrel feeder.
It's so much fun to watch them gnaw at it and then scamper along the fences!

My local hardware store carries these dried corncobs, but you could also check for them at feed stores or online. They go pretty fast so it's worth shopping around for the best price!
Another way to inspire awe and wonder is with plantings. Look for unique and interesting plants, like this curly grass.

Kids love to hide under bushes, climb trees and duck behind plums of large grass. So visit your local nursery to see what is interesting and best suited to your climate. I always try to chose drought tolerant perennials. My preference is for plants that can withstand winter frosts and water rationing.


Also, see my blog post about exciting day glow plants for more inspiration in this area.
Ready Made Elements
Sometimes it's just easier to buy things pre-made for your outdoor play space. But, they need not be made of unsightly plastic. In a the lower section of our yard we've added two readily available things that are very attractive to children.

The first is a simple hammock. It's surprising what a child-magnet this thing is! You can hang one between two trees, or with a hammock stand like I did.
Just be sure that your hammock is the right length for your stand, they are not all standard sizes.

Next, we added a classic dome shaped climbing structure. This particular model was not very expensive and it's very sturdy.
Assembly was a little tricky however. It took two adults several hours. But the payoff has been well worth it!

The dome is the perfect size for my 6 year old, and my 3 year olds are starting to get the hang of it. This structure also lends itself well to open ended creative play. It can be anything they can imagine it to be. One day it's a castle, the next it's a spaceship! Through a sheet over the top and it makes a great tent!
We also have a fairy garden. For more details, see my other blog post on the topic.


Lastly, if you're short on yard space, then see my other post about creating a play area in a tiny yard (or even on just a balcony) here:

That's all! Thanks for stopping by, and have fun playing!


**Recently, I was SO honored to do a guest post on this topic on my dear friend Shelly's amazing Homeschooling blog. For that post, and much more, visit her here Here!
http://www.elizabethandcovintage.com/2015/06/june-garden-party.html
http://www.linkytools.com/wordpress_list.aspx?id=242109&type=thumbnail&AspxAutoDetectCookieSupport=1
http://www.oneprojectcloser.com/creativity-unleashed-link-party-8/
http://thegrantlife.com/life-party-54/
http://www.justusfourblog.com/2014/09/pinworthy-projects-party-80/
http://www.dianarambles.com/2014/09/pin-me-linky-party-102.html
http://chiconashoestringdecorating.blogspot.ca/2014/09/flaunt-it-friday-223.html
http://thecharmofhome.blogspot.com/http://www.justusfourblog.com/2014/09/pinworthy-projects-party-80/
http://www.dianarambles.com/2014/09/pin-me-linky-party-102.html
http://chiconashoestringdecorating.blogspot.ca/2014/09/flaunt-it-friday-223.html
http://www.thirtyhandmadedays.com/2014/09/party-bunch-week-47/
http://www.frenchcountrycottage.net/2014/09/feathered-nest-friday_11.html
http://romantichome.blogspot.com/2014/09/a-little-autumn-decor-show-and-tell.html
http://www.craftberrybush.com/

I love this post!! Yes, the texture and shapes of natural materials are something that you just can't get with molded plastic. I will feature this post Thursday at Home Sweet Home! My boys would have loved this playground!
ReplyDeleteIts so fun to be featured, thank you!
DeleteThis is an amazing blog post, and I'm SO impressed with your play yard. It occurred to me as I looked at your pictures that all of my memories of playing as a child are of playing on natural structures, not playground equipment. I recall climbing on large boulders, making elaborate villages in the dirt with sticks and stones, skipping stones across ponds, and climbing trees. Yet it never occurred to me to put those things in our yard for our daughters to play on; instead we bought plastic play structures from Toys R Us. After seeing what you've done I wish we could do it all over again, and I'm passing your wonderful post on to my daughter for our future grandchildren. Thanks!
ReplyDeleteThank you for your kind words and for sharing your sweet memories!
DeleteTrying to put together something this in my own backyard and at my father's house. You have provided so many great ideas! Thank you.
ReplyDeleteTrying to put together something this in my own backyard and at my father's house. You have provided so many great ideas! Thank you.
ReplyDeleteOh my goodness. This is JUSt the medicine I need to see and read tonight! After stumbling on you FANTASTIC blog while I was looking for a tutorial on Lazure painting (with out much luck) I am sooooooo happy now! I found so MUCH more inspiration here! Wow Mamma! I wish you lived closer! I LOVE your back yard! I home schooled my daughter for a few years, who is eleven now, Waldorf style, and now I have a 20 month old son. So, I am needing to get on the ball for my next young one who is needing more and more Waldorf inspired play. GREAT IDEAS and so exquisitely done. You are a master! Be proud!
ReplyDeleteWow, thank you so much for the sweet comment! I hardly feel like a master, but I do what I can, hahaha :) I'm so glad you found my blog, and that these posts have been an inspiration for you! I had the same problem when looking for a Lazure tutorial. I couldn't find much. So I decided to make one! Good luck in all you do!
Delete