google-site-verification: googlef2ba99a3ab5aecea.html
Showing posts with label fairy. Show all posts

Thursday, August 18, 2016

How to Make Drip Castles

Summer is almost over! We have been enjoying soaking up those last rays of warm sunshine, and spending as much time as we can outdoors! One thing we enjoy doing, both at home and on vacation, is going tho the beach and playing in the sand.

how to make drip castles

Growing up in San Diego, one of my favorite things to do as a child was go to the beach and build drip castles. I still remember the day my mom first showed me the simple magic that is a drip castle!

how to make drip castles

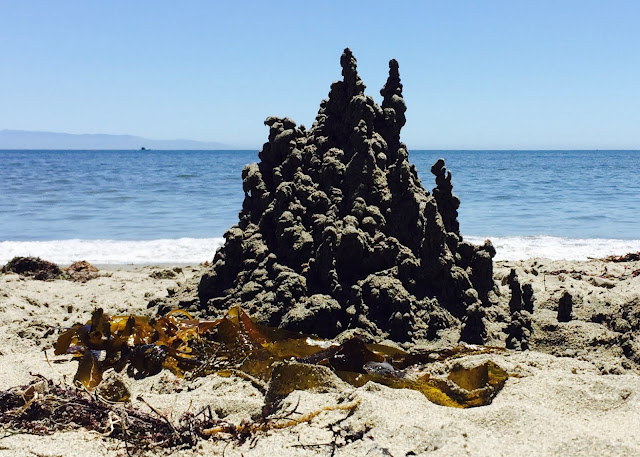
Drip castles rise from the shore like mythical mermaid mansions. But, they are also really easy to create! I've tried making these with (backyard) sand box sand, and it doesn't work as well. I'm not sure if you need the salty sea water, or the fine beach sand, but for some reason I've only been able to make these at the beach.

To start, make a regular sand castle (just a pile if damp sand). This will be your base.


Usually about a foot will be tall enough. But you can make your castle as elaborate and large as you want to!


Next fill a container with ocean water. We've had this little sand play set for years, and love it!


Next, add some sand to the water in your bucket. I usually fill it about 3/4 full of sand. You'll want to keep it VERY watery.


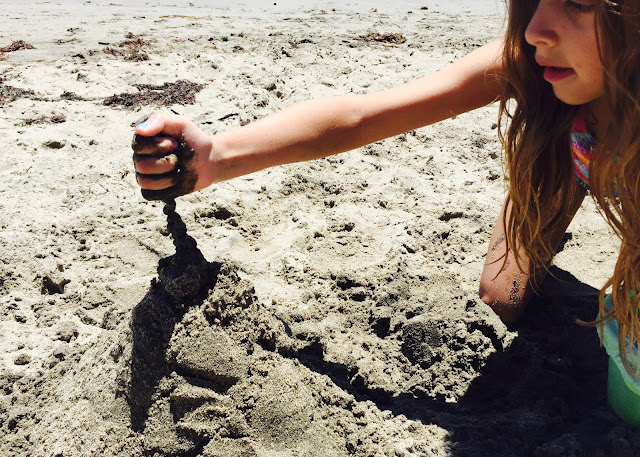
Now comes the fun part! Dip your hand into the water and grab a handful of sand. You want it to be very drippy. Then quickly (before too much of the water drains out) drizzle the sand onto your castle.

how to make drip castles

After a few seconds, the sand in your hand will become dry, and start to clump. That's when you know to go back for a fresh scoop. Eventually, you will notice the sand begin to pile up on top of itself, creating and otherworldly formations.
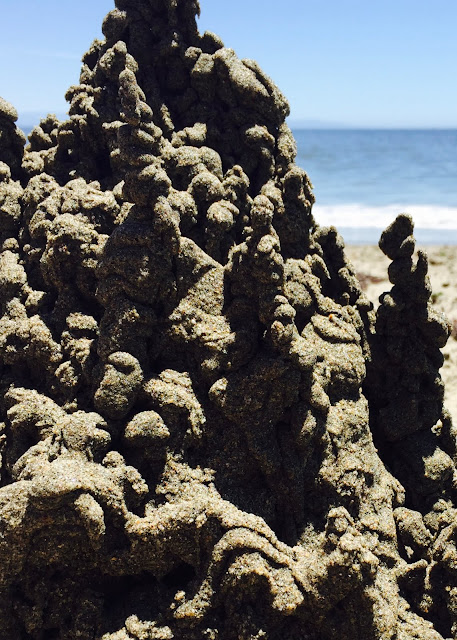
how to make drip castles
Add caption


Play around with moving your hand slowly to the side, and keeping it in one place. You'll discover that you can create a variety of shapes and towers!

how to make drip castles

It's fun to see how tall you can make them! Sometimes it can also be fun to add a few "guard towers" on the flat part around your castle.

how to make drip castles
Add caption


Sometimes, if we are very careful, we are even able to make small holes, tunnels and bridges!

how to make drip castles

If you stay at the beach long enough, eventually you'll notice that even once your drip castle is dry, it will still retain it's shape!
Encourage mermaids and other sea creatures to visit by embellishing your castle with found objects. Things like kelp and shells work great for this!
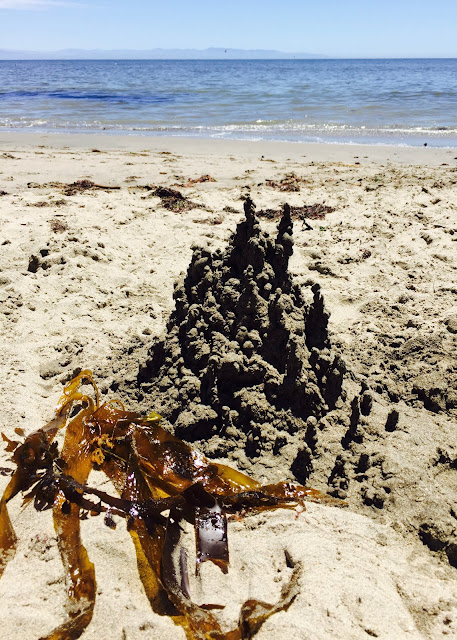
how to make drip castles
Add caption

Sit back, soak up the sun, and enjoy your handiwork!

how to make drip castles


That's all, thanks for stopping by!


Linkning up to these fun parties:

http://livelaughrowe.com/vegetable-side-dishes/
http://www.artsyfartsymama.com/2016/08/artsy-fartsy-link-party-3.html
http://staceyembracingchange.com/2016/08/18/creative-inspirations-linky-party-and-features-10/
http://www.posedperfection.com/2016/08/creative-ways-link-party-119-and.html
http://tidymom.net/2016/homemade-after-school-snack-recipes/
http://www.oneprojectcloser.com/creativity-unleashed-link-party/
http://www.mysuburbankitchen.com/2016/08/pinworthy-projects-party-162/
http://dianarambles.com/2016/08/pin-linky-party-203.html
http://www.avisiontoremember.com/2016/08/the-creative-exchange-august-18.html
Saturday, February 13, 2016

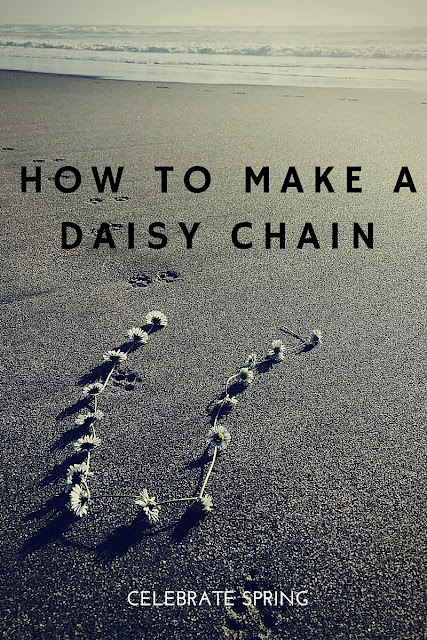
How to Make a Daisy Chain


How to make a flower necklace

Spring is here (or near) and the daisies are blooming!


Nothing says "childhood" like an inviting patch of green clovers, and delicate white flowers.


The next time you come across these sweet signs of spring, try this simple craft.


How to make a flower necklace

First, pick a batch of flowers, trying to select the ones with long stems.


For the next step, I used a pocket knife, but your fingernail can work just as well.


Cut a small slit in the end of one of the stems. Be careful that it doesn't go all the way to the edge.

Next, thread the end of another flower through the hole you've just created. This should feel like threading a needle.


Then, gently pull one stem through the other, until the flower itself stops it from going any farther.

How to make a flower necklace
How to make a flower necklace 

After that, repeat the process over again, making a hole in the stem of the most recently added flower. Continue to do this until you have reached your desired length.


Soon you should have a chain of flowers!

Loop it around your neck, and tie a loose knot in the back.
Enjoy!


These can be made into crowns, bracelets, necklaces and more!


Also, after making these sweet chains, you may want to enjoy the classic book Daisy-Head Mayzie
By Dr Seuss


Daisy Head Mayzie


Thanks for stopping by, and happy crafting!


Linking up to these fun blogs:


http://www.flourmewithlove.com/2016/02/mix-it-up-monday-blog-party-without.html
Wednesday, July 16, 2014

Clearance Rack Fairy Makeover

 I'm always on the lookout for a good bargain. Recently, while picking through the clearance rack of my favorite local gift shop I can across this little lady:


She had obviously seen better days, and her sloppy paint job felt a little to "kitschy" for our garden. 


Obviously, the first step was to reattach her broken wing with some craft glue.
Next, I began to think about paint. 
 I'd recently discovered a new product, and I was anxious to try it out. Thinking back to my old days in art school, and the lovely patinas we'd created for foundry courses, I'd decided to try a short cut and order a Rub Buff Metallic Finishes Sampler. 


The directions weren't clear, so I just played around with an old paint brush, a rag and layering several colors. The results were great! Now our happy little fairy looks right at home next to a copper bowl of water in our fairy garden. 


She's even been joined by a few friends!


Thanks for stopping by!
Hayley Brentmar

Fairy Herb Garden


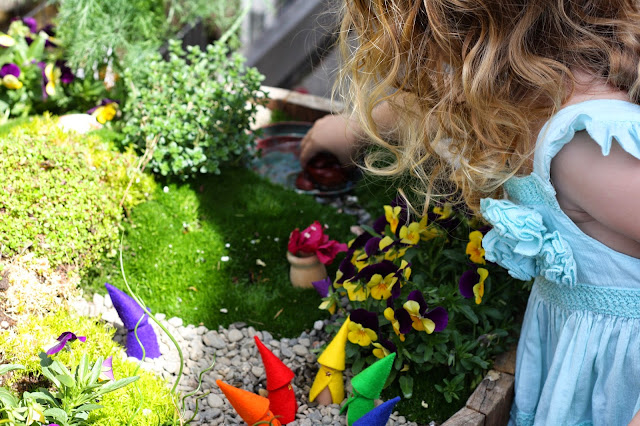
Over the last few years we have been cultivating a fairy herb garden. It's been with us through several moves, many seasons, and it continues to grow! All 3 kids love playing with this miniature and magical world.

We are convinced that fairies visit often too!


We started with a large oak barrel (find at garden supply stores or wineries). Then we filled it with organic potting soil. 


 *Handy to know* One way to save money on soil is to add packing peanuts or drainage rock, under the dirt. Another handy trick, is to line the bottom with a few disposable diapers. They will help retain moisture and reduce the need to water.


Then, the fun part really began! 
First, we added plants, and a few special treasures from our yard.

Herbs mingle, to wrap around a carved redwood mushroom. 

Since I wanted this to be a safe and inviting place for children, we chose plants for both aesthetics and safety. Considering the fairies, we added plants for their small stature, choosing delectable specimens with small leaves and magical qualities. 


Curly grass adds a magical element, while a hidden egg treasure nestles in canopy of thyme.
This vigorous (and easy to grow) herb arches over Fairy Beach

For ourselves, we wanted the plants to be safe. There are only non-poisonous, thornless, and even some eatable plants in our garden. Aromatic herbs (like rosemary and thyme) add the additional element of delightful scent. This is why I like to call it, our fairy herb garden.
We love to use these herbs for cooking, or to just rub the leaves between our hands and enjoy the lovely scent. 

Next, we began to add accessories and small trinkets, to entice the fairies into our garden.


Welcome Fairies!
This ladder (originally made for a bird cage) provides entrance access for non-wingded magical creatures too!

Springtime flowers beckon along side a small garden path.

Bubbles and a blue gnome!


Clay mushrooms cling to a mossy side

An acorn flagpole stands at the cave entrance


To make the cave, we turned a ceramic pot on it's side and buried the bottom half. Then we covered the top with moss and creeping thyme. The inside we filled with pea gravel and an interesting stone. This makes a great Lenten Garden during Easter too!


We even created a special garden swing for the fairies to enjoy. (Tutorial here)


Soon fairies began to arrive!


Ready-made miniature fairies are pretty easy to come by. There are usually some available in garden centers or even on Amazon. This little fairy pictured above came to us via a clearance rack steal! When we found her, she was oddly painted, and one wing was broken. But we saw her potential immediately! (Witness her transformation here).


The fairies really enjoy the cool garden waters, and their very own "Fairy Beach"!


A fairy perches on a geode surrounded by a "fence" of old hardware.
I've been collecting old faucet parts for years, and found that they made a great border for our garden!


Just add kids!


Over time our garden has grown and changed, both because of Mother Nature and because of our own creative impulses. It's been fun to see the transformations each season brings!


Our fairy garden was once part of our small patio


The garden in it's newest home


You may also like these fairy garden posts:


Come play again soon!


Hayley Brentmar