google-site-verification: googlef2ba99a3ab5aecea.html
Showing posts with label Children. Show all posts

Sunday, June 21, 2020

Tutorial: Create Your Own (Space Saving) Timeline


I can still vividly remember the first time that I was able to grasp the notion of "time" as a child, and specifically, how long "ago some historical events happened.

Only a good visual aide could have done the job!

I encountered the concept of an extended timeline while watching a TV show.  The show explained that the timeline (featured in the show) started during our current era, and stretched back to the age of the dinosaurs.  Then, the timeline was revealed.  

But, it didn't look like the timelines I was used to seeing printed in the pages of textbooks, or tacked to  classroom walls.  Rather, this was a big THICK roll of paper. The children in the show were given the cylinder to inspect.  

Slowly, the kids on TV set the cylinder on its side, and started to tentatively unroll the paper.  At first, they unrolled a blue section (blue represented how long humans had walked the earth).  Then they continued to curiously and carefully unroll even more. 

As the paper stretched, blue was quickly replaced by other colors (each new color representing an older era in the history of Earth).  Eventually the length of paper stretched all the way across the room.  The kids giggled and unrolled faster.  Suddenly they were out the door!  The roll of paper bounced down the porch steps, and into the yard! 

I watched, mesmerized, as the cylindrical timeline kept rolling and rolling, leaving a multicolored path.  Suddenly, entire ice ages, neanderthals, and the Paleolithic Era all came and went.  The kids on TV laughed with amazement!  They were skipping now, pushing the roll of paper further.  On and on it went, moving down the sidewalk and past other houses.  

Then, at last, a final red section was revealed; they had reached the era of the dinosaurs. And, they had also reached the end of their city block!  I was astonished by how far the timeline had stretched.  To this day, the image of that scene is still cemented in my memory.  

So, I wanted to provide my own children with a similar understanding of time, and with a fantastic visual aid! 


I also wanted a timeline that we could fill out as we learned, so it needed to be easily accessible.  Pinning it high on a wall would not do.  And I wanted them to have the same experience of "unrolling" time. 

So, I came up with an idea for a portable timeline that could be extended and also easily stored away when not in use.


How to Make Your Own File Folder Timeline


First, I adapted a very simple template to the length of time we were going to study (in this case it was North American History).  I modified it the "old fashioned way"  (by using my copy machine, a black colored pencil, a ruler, and plenty of whiteout)!

Click Photo to Purchase


Click photo to purchase


Our timeline goes from 50,000 BCE up to present day.  Because I wanted to start with the first humans migrating across the land bridge from Asia into North America, it goes really far back in time.  So I adjusted the time intervals to be more condensed near the beginning, and more “spread out” as it got closer to the era of United States history.  It’s still really long, and it easily stretches across the whole room!


For fun I added our birthdays too!

Then, using scotch tape I attached each paper together in a long line, and folded the pages like an accordion. I found it worked best to apply the tape so that it would be on the outside of each fold.  

At the end I flipped the entire length of paper over and went along the back horizontally with a length of packing tape too (to make it even stronger). 

Click Photo to Purchase


Click Photo to Purchase


Next, I cut a hanging file folder in half (along the fold/crease) so that it was in two separate pieces.  Then I glued the two ends of the timeline to the inner side of each folder side.  

Click Photo to Purchase


To make it a bit more fun and fancy I made a cover page (by hand, with my favorite brand of colored pencils!). 


*Side note: Prismacolor makes the very BEST colored pencils!  The link above is to a basic set. But, they sell them in much larger sets too. 


I attached the cover page using layers of colorful masking tape, and even added a bit more embellishment with Washi Tape.

Click Photo to Purchase

Click Photo to Purchase


*Note: The washi tape didn't stick very well, so I just went over the ends with more packing tape to reinforce it. 


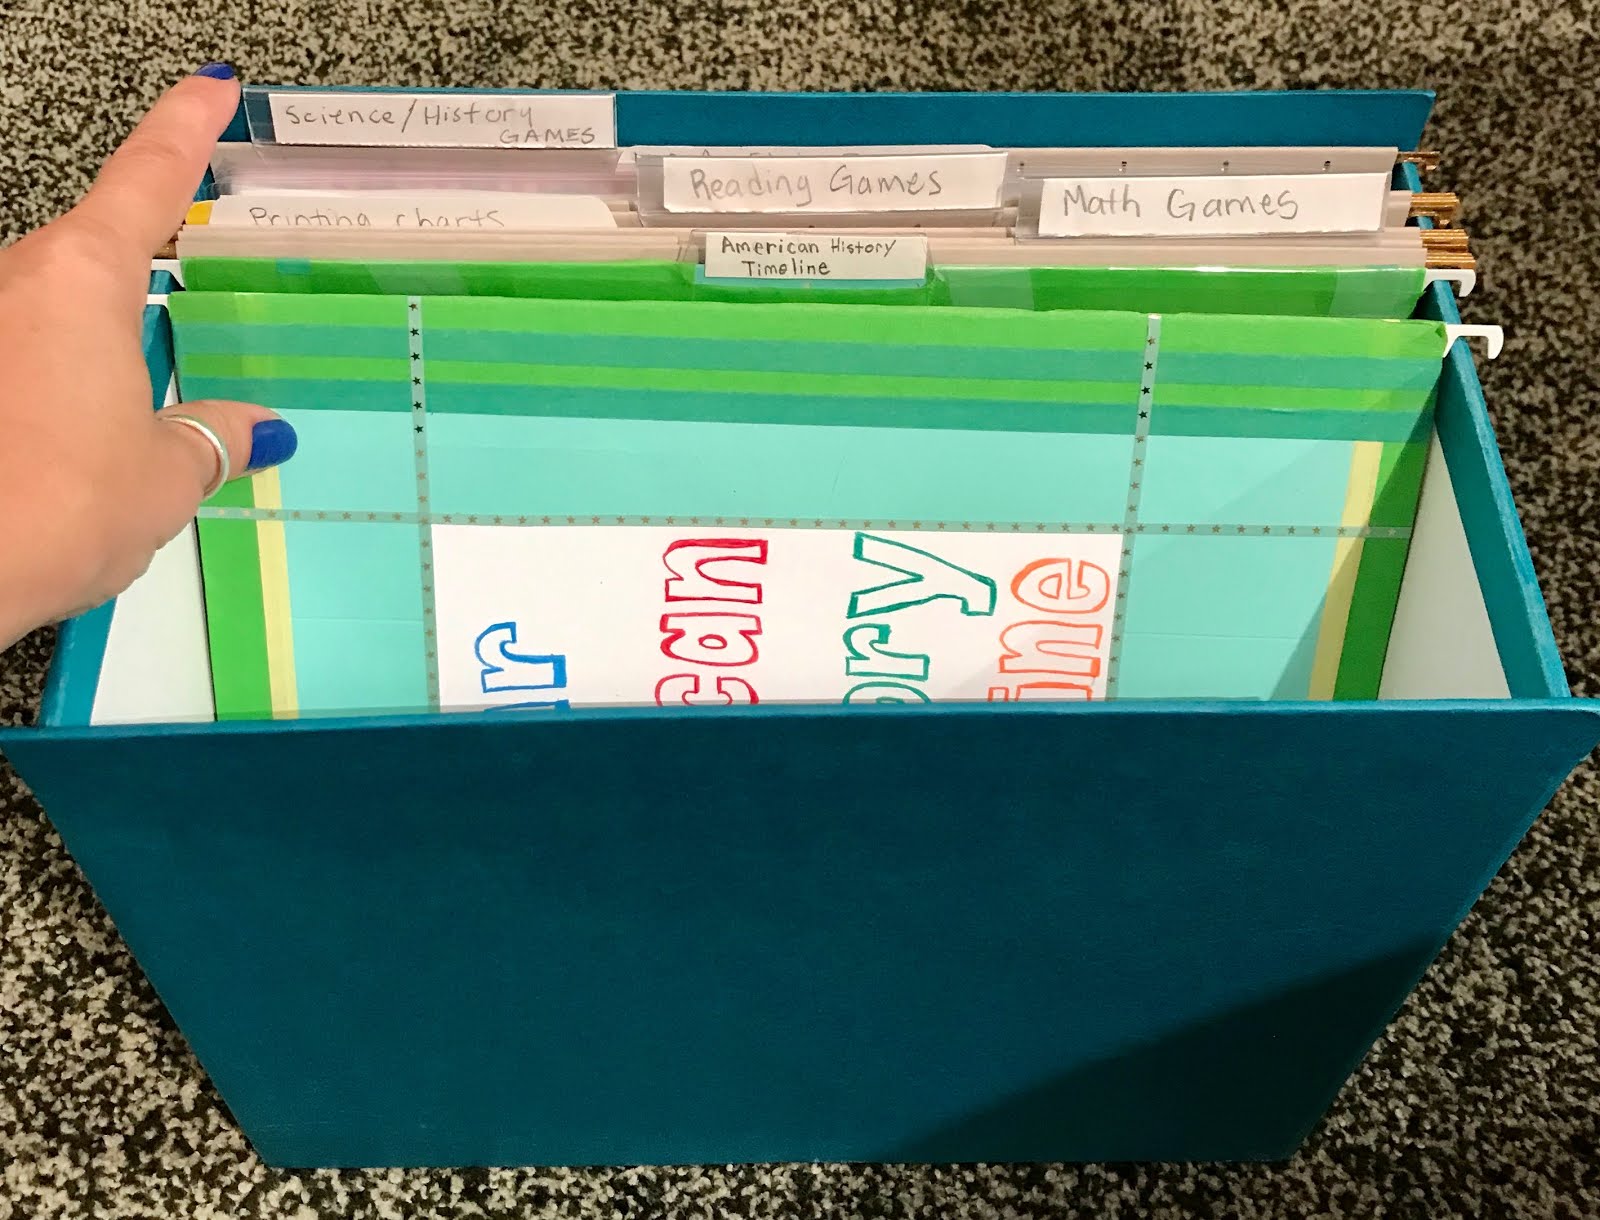
Right now our timeline lives tucked in with the rest of the books I'm using for our study of US History (in an old magazine rack). 


But as a bonus, it can also be stored in a standard hanging file box too!


I hope this tutorial has been helpful to you.  If you have any questions (or thoughts) please feel free to leave them in the comments section below.  Thanks for stopping by! 

Sunday, February 25, 2018

Glue and Sand Bowl Craft

Make you own sand and glue bowl!


I LOVE Pinterest, and my guess is that you do too! If you are a fan, then chances are that you have probably seen this pin slide down your screen at least once:


Pinterest Perfection

The subtext promises that this elegant bowl is easily replicated, by simply by mixing sand and glue. Then according to pinterest you simply drip it over a bowl and let it dry.

However, as some have found this is much easier said than done! For fun see this "Pinterest Fail" Video.


Or not!

Still, I knew even after watching that video, that the original Pin had to exists somewhere. I figured that with a little tweaking and testing I might be able to get a similar result. 

In my experimenting I found that by using two different types of glue, I could get a pretty decent version of the sand bowl. For fun I used colored sand, but you could use regular beach sand too.


Here is how I made mine:

Supplies


Traditional Elmers Glue


Quick Dry Tacky Glue


Plastic Cling Wrap


Colored Craft Sand


A Big Mixing Bowl


Medium size Cereal Bowl


Metal Spoon


Painter's Tape


Step One:

To protect your bowl, turn it upside down and cove it completely in plastic wrap. This will keep the glue and sand off of it, and will also create an interesting texture in the interior of your bowl. I used about two layers of plastic on the outside of the bowl.


I found that it helped to secure the plastic wrap to itself using blue painter's tape. Now your "mold" is prepped and ready!

Step 2

Now comes the secret part!


The instructions on the original pin will tell you to use Elmers glue. I tried that and did not have a good result. The glue dried too slowly and the sand did not sick together.
But, then I discovered that if I used one part Elmers to one part "Quick Dry Craft Glue" with the sand it worked well.


I didn't need to measure exactly. Rather I simply added a little at a time, alliterating between the two glues and stirring. This way, in the end I had about equal parts of both glues in the sand mixture.

Continue adding glue (and if needed, more sand until you reach a consistency that feels like think dough).


It should look and feel like a thick (grainy) play dough. I found that if the mixture is too thin and watery, then it won't hold together when dripped over the bowl. Rather, gravity will pull it apart into pieces. So, you want this to be pretty thick, and just past the point of being crumbly.


Step 3

It's time to start applying the sand mixture to the bottom of your bowl!


I found that it was the easiest to simply scrape the sand/ glue onto the very highest point on the bowl, and then use the back of a metal spoon to gently "coax it downward and toward the sides.


I used gentle pressure in a spiraling motion, form the center outwards to coax the moisture into place.


After about 5-10 minutes gravity will take it's course and pull the sand downwards.


Step 4

Continue adding layers.


If you want to have more control you can wait for each layer to dry before adding the next one. But, I didn't have the patience for that! So I just kept adding more and more!


You can even use your hands to encourage the sand to go in specific directions. Just gently press it in the direction you want it to go. I found this helpful for coving any gaps in the layer below.


For fun, I chose to add my colored sand in "rainbow order" layers. But you can chose any method you like. Or for a more modern and natural look, skip the color and just use plain sand.


Step 5

Allow several days for your bowl to sit and dry completely. The thickest layers take the longest.


Step 6

Once all parts of your bowl feel very hard to the touch, you can remove it from the mold.


Simply flip your bowl over, give it a little wiggle and it will easily come loose.


Next, just remove the plastic wrap to reveal your lovely creation!


This bowl made me think of a coral reef, and lovely things under the sea. So I chose to display it as summertime decoration. I added starfish, but you can use anything you want to fill it, or even just leave it empty!


I've also found that in the off-season this bowl is great for holding remote controls in the family room!


That's all for today, thanks for stopping by!


Linking up to:
http://madincrafts.com/mad-skills-link-party-411/
http://www.ishouldbemoppingthefloor.com/2018/02/colorful-spring-diy-projects-at.html
http://www.sewcando.com/2018/02/lets-get-festive-craftastic-monday-link.html
https://diyshowoff.com/2018/02/25/diy-party-time-264/
http://www.niftythriftythings.com/nifty-thrifty-sunday-323/
http://www.gingersnapcrafts.com/2018/02/wow-me-wednesday-340.html
http://www.mygirlishwhims.com/2018/02/your-whims-wednesday-344-and-features.html
http://www.savvysouthernstyle.net/2018/02/wow-us-wednesdays-377.html
https://thediydreamer.com/from-dream-to-reality/do-some-crafts-301/

Thursday, March 9, 2017

Rainbow Party Favors; Goody Bags

Any time of year is great for colorful rainbow themed parties. Usually, they seem to pop up closer to St Patrick's Day (this year it's on March 17). But, I’ve never been one to “follow the rules”. 
So, I say... if you want to throw a rainbow party, do so at anytime!


When I first started searching Pinterest for rainbow party ideas, I felt a little intimidated. There were hundreds of photos, of flawlessly executed parties… parties that looked like the had been designed and set up by professionals. Even the tutorials were intimidating in their perfection! 

You will not find that here.

Instead, I am going to do a series of blog posts on how I (a mere amateur) put together my kids’ rainbow theme birthday party. Plus, I was able to do so easily and inexpensively.  Almost everything was DIY, or at the very least, purchased from inexpensive and accessible sources. 

No professional planner was used in the creation of this celebration. This is real life, and I was the planner!

Because it’s what I started with, today I am going to focus on the favor bags that I put together to share with our guests.


It was fun and easy to gather the elements for these, and they were a big hit! The best part was that I was able to order every single thing without leaving the comfort of my own couch (Oh, Amazon Prime, how I do love you so!)

First I started by creating small Waldorf inspired ribbon rings. These are great fun for throwing or dancing with, and I love that they are also an open ended toy. 


Here is my tutorial on how to make them:


Then using supplies purchased entirely from Amazon (read: without even having to leave the house!) I put together these sweet little sketchbooks. 


Here are the products I ordered:


I cut the stickers into strips, sharpened the pencils and used the colorful ribbons to tie it all together in a neat little package.


Then I added even more colorful goodies to the favor bags! Including these items:


And, don't forget the treasure at the end of the rainbow!


Lastly I decided to add just one more treat (not pictured). So, I added two of these fun crystal lollypops to each goody bag.


Then to wrap it all up, I used plain paper gift bags. 


To make them more decorative and unique I packaged them with colored tissue paper, and finished each on of with a rainbow bow. 


Our guests (both boys AND girls!) were delighted with their fun and colorful keepsakes!


Stay tuned for more posts on the fun details of this rainbow party!

That's all, and thanks for stopping by!


Linking up to these fun parties:
http://www.uptodateinteriors.com/2017/03/the-creative-circle-no-107.html
http://staceyembracingchange.com/2017/03/16/creative-inspirations-linky-party-and-features-35/
http://www.artsyfartsymama.com/2017/03/artsy-fartsy-link-party-3.html
http://www.uptodateinteriors.com/2017/03/the-creative-circle-no-106.html
http://staceyembracingchange.com/2017/03/09/creative-inspirations-linky-party-and-features-34/
http://www.artsyfartsymama.com/2017/03/artsy-fartsy-link-party-2.html
http://diyshowoff.com/2017/03/12/diy-party-time-214/
http://www.skiptomylou.org/made-by-you-monday-46/


Contact Me

Name

Email *

Message *