It's that time of year again in my household: Birthday season!
Luckily all 3 of my kids' birthdays are two weeks apart, so we are able to have one big celebration for everyone. This year I decided to go with a colorful "rainbow" theme.
For the party favor bags, I wanted to be sure to include a handmade element for each child to enjoy. I love providing children with lovingly handmade things to pay with.
But, there were a few requirements. For one, it needed to be something that I could easily produce and in a short time. Also, it had to go with our colorful rainbow theme and be inexpensive.
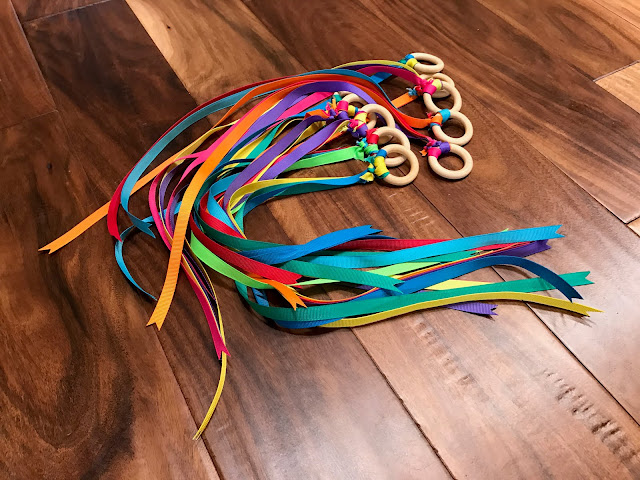
So, created small Waldorf inspired ribbon rings. These "Hand Kites" were the perfect addition to our favor bags!
They are great fun for throwing and watching them soar through the air, or for simply dancing around with dancing around with. Plus I love that they are also an open ended toy.
Here are the supplies I used for this project:
Wooden rings:
Clored ribbon. (I used two packs of this to make about 20 rings)
Sharp Scissors
From there it was super easy to make these!
I chose 3 coordinating colors to use for each ring. Usually I used analogous colors (or colors that are next to each other of the color wheel). Then, I empty an entire spool of ribbon, and cut the length of it exactly in half.
Each (half length) strand of ribbon was the perfect length for one ring.
Then:
The next step was super easy too. I looped the ribbon through itself to secure it onto the ring, leaving one side much longer than the other. Then, I pulled it tight.
The next step was super easy too. I looped the ribbon through itself to secure it onto the ring, leaving one side much longer than the other. Then, I pulled it tight.
To make sure that they held up to rough play, I further tied one end of each ribbon securely onto the wooden ring. Then, I snipped off any access ribbon (from the short ends) near the knots.
Lastly:
To dress them up a little, and keep the ribbon from unraveling, By making one diagonal cut, I cut a "v" shape in the end of each ribbon. Sharp sewing scissors make this step much easier.
Simply hold the ribbon between your fingers, pinch it in half and make a diagonal cut across the folded ribbon (pointing towards the wooden ring). Essentially you want to cut out a small triangle.
Lastly, enjoy and share your colorful creations! They are great for tossing through the air, dancing or anything else your imagination can think of.
That's all, and thanks for stopping by!
Linking up to these great parties:
http://www.gingersnapcrafts.com/2017/02/wow-me-wednesday-287.html
http://www.mygirlishwhims.com/2017/02/your-whims-wednesday-295-and-features.html
http://www.savvysouthernstyle.net/2017/02/wow-us-wednesdays-314.html
http://www.colorsandcraft.com/blog/2017/2/share-it-link-party-258
http://thediydreamer.com/from-dream-to-reality/share-crafts-diy-projects-255/
http://www.uptodateinteriors.com/2017/02/the-creative-circle-no-104.html
http://staceyembracingchange.com/2017/02/23/creative-inpirations-linky-party-and-features/


