google-site-verification: googlef2ba99a3ab5aecea.html
Showing posts with label Before/After. Show all posts

Friday, May 29, 2015

Living Room Makeover


It's flashback Friday here at Leaving the Ivory Tower. Today, we're traveling back in time to when we bought our first house. This tiny 900 square foot beach bungalow was the cheapest home in town, and it showed!

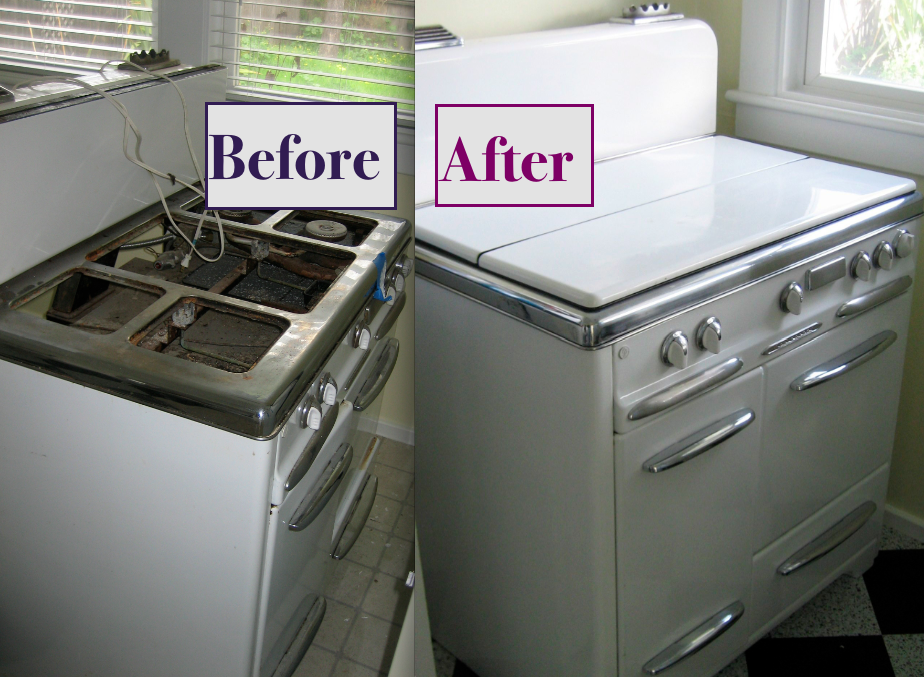
The home had been a rental for college students, and had seen her fair share of parties. But, we saw that she had "good bones" and great potential.

It took a little (actually a lot) of TLC, but eventually she shined and was even featured on national TV!


beach bungalow


Today we're stepping into the living room for a details about the changes we made there. Join me for a "budget friendly" living room remodel!


Before


Sadly neglected, this foreclosure had seen better days.  Carpets were stained, windows were broken, and there was even a crack-pipe laying in the (weed covered) yard.

But, we saw that despite the neglect, she still possessed many of her subtle charms.  An archway lead to the dinning room, and thick wood trim still lined the windows.

The carpet was covered with burn marks, beer stains and who knows what else!


Carpet, before


Carpet, before


Can you tell where their couch was?!


Living room floor, before


We suspected there might be good things hidden underneath that gross carpet. So, one of the first things we did was pull up a corner of the carpet (it was actually only a few years old!).

Much to our delight, we discovered the original heart Douglass Fir wood floors hidden underneath!  

This is often the case in older homes (this one was built in 1928).  So if the carpet is in poor condition, like this was, see if you can sneak a peak underneath.  It's easy to (inconspicuously) pull up a corner to look.

Original wood floor, before


We knew the wood floors would need refinishing, so I quickly started painting the walls.  When "flipping" a room, it's best to work from "top to bottom" (starting with the ceiling).  This way I didn't have to worry about dripping paint on the floor, because I knew it would just get sanded off during the refinishing process.

Because I like bold color, and because the style of the home lent itself fun choices, I went for a bright cheerful green for the walls.  It was essentially the color of wasabi!


Wasabi Green!


Next, I painted the 4th wall (the one with an open arch leading to other rooms) white.  Because I wanted a crisp clean look, I just used the standard out-of-the-can "ultra pure bright white".


Then, it was time to refinish the floors. This was one of the things we splurged on. We brought in a professional. You can rent a sander and do this job yourself.  But for DIYer's (like us) I wouldn't recommend it because upright sanders can be tricky to control.


Floor refinishing process


They sanded through old floor, old finish and replaced a few rotten boards.  Even though they draped the house in plastic, this still made a HUGE mess.  There was a fine layer of sawdust everywhere!


Wet finish on floors


Also, note that the finish they put on the floors has a very strong chemical smell that lingered for a couple of days. We were living there, and I was pregnant, so it was not pleasant. If you can, stay away during this time!


Before


After


To hide some of the flaws that remained, and because I like to look, I chose the darkest stain available.


Then it came time to add furnishings and decor...


Before


After


Because the room was so small, we opted for a red love seat (purchased from a local furniture store) in place of a full sized sofa.  Red and green are complementary colors, so this worked well with the vibrant walls.  Also, smaller scale apartment sofas, are perfect for small spaces.

We also hid our TV inside of an armoire, and used a storage trunk as a coffee table.  In a small house it's important to add storage wherever you can!

Simple sheer white curtains, a dark brown club chair, my own painting and a DIY suitcase table finished off the look.


After


After


I spray painted an ornate hand-me-down mirror red, and we added some sturdy wood shelves from Ikea.

We played around with how the furniture was arranged, and switched around accents.  It was fun to be able to make these small changes.

Overall we were so happy with the end result! Instead of having a a living room that was dreary and depressing, this little house suddenly had one that was bright and cheerful!


Before


After


When we were selling this house we had a neat surprise. The day after we accepted an offer, this house was featured on the Today Show! We still don't know how they found us. But is was pretty cool be be selected and featured on a national TV show, even if it was a day too late to help us with the sale!


Here is the link to watch the Today Show Segment.  There is a short ad.  To see our house featured fast forward to the 1 min 13 second mark.


It was pretty funny to hear Al Roker commenting on my "strong art" (a painting I made in college), and to hear the comments about how there should have been "chunky red cookie jars" in the kitchen... which there were, 3 of them, just off camera!


For more about this house, and our complete bungalow remodel, please stay tuned for future posts. 


Thanks for stopping by!


Also, to see more of the drastic changes we made in this home, please enjoy these other posts as well:


Linking up to these fun parties:

Friday, January 16, 2015

Budget Bathroom Remodel


A "new" DIY bathroom, without spending a fortune!


So often redoing a bathroom involves expensive changes like new vanities, floors and fixtures. The trouble was that I had a bathroom that needed big changes, and a small budget.
My only option was to so my best to make cosmetic changes, without spending a lot of money.

Removing the Wallpaper

The first plan of attack was to remove the wallpaper. As you can see it even came complete with, not one... but TWO borders. While I appreciate that the former owner loved this room, it simply wasn't my style. 

Before


The flowered walls had to go.


I've heard so many horror stories about what a nightmare removing wallpaper could be, but it really wasn't that bad.
Basically I peeled off anything that I could get off before getting anything wet. It's so satisfying when you get a really big piece!
Then, I used this mixture to loosen the adhesive and remove the wallpaper :

2 parts hot water
1 part liquid fabric softener
2 parts white vinegar 


Using a rag I saturated whatever was left of the glue and paper with the mixture. After letting it soak in for a few minutes, it was easy to scrape the remainder off. 


Before


After

It was tedious to get all that paper off the walls. But with the company of some good podcasts for entertainment, the time went by fast. I was able to get all the paper off in about a day. 

*My favorite podcasts to listen to are: Stuff You Should Know, This American Life, Serial, Radiolab, Freakanomics, Stuff You Missed in History Class and The Moth
You can find them all on the iTunes Store


Painting


When redoing an entire room, it's best to start from the top and work your way down, literally. So the next thing I did was paint the ceiling. 


To brighten things up without making the room feel too cold, I used my favorite warm white paint (Benjamin Moore's #925 "Ivory White") on the ceiling.  Then I used the same color for the 2 walls, the cabinets and the door. Many paint stores don't have this color on display in their inventory. But, they should have access to the codes and will be able to mix it for you if you request it. Next I used a warm blue (close to turquoise) on the 2 remaining walls. 

Covering Old Surfaces

Dingy fake marble wasn't on my list of preferred countertops, but unfortunately a new countertop wasn't in the budget either. That meant that it was time to use one of my favorite "cure-all" products. Rust-oleum Tub and Tile.


Before

Not only was the counter ugly, but it was stained too!


After

Rust-oleum Tub and Tile is an epoxy based product that literally glues itself to countertops and tile. I even used it on the old beat-up porcelain sink. Once you mix the product together, you have about 4 hours to use the it, so plan accordingly. Also, plan on using a junky brush that you can just throw away afterwards. Even paint thinner wouldn't clean this stuff out of my brush.

For some subtle variation in tone I used "Almond"on the counter and the shower walls, and "White" on the sink, the floor tiles and on the shower floor. 

Completed countertop

Yes, as you can see from the photos bellow, Rustoleum even covered the dark blue floor tiles. It took a few coats, and several cans. But before long we had a gleaming white floor, for less than $100. 

Dark blue tile before


The tile was dark blue, cracked and chipped. I just covered it all up with this great stuff!


I used "Almond" on the walls of the shower freshen up the 70's era tile. 


Before


After
This stuff is really drippy, so be ready for a constancy that is thinner than regular latex paint. But, as long as you keep checking back for drips and making touch-ups wherever needed, you'll end up with a nice new surface. 


WARNING: This product produces very strong fumes. Be sure to work in a well ventilated area, and if you can wear a protective mask. I use one like this.


Spray Paint is Your Friend!

Once again, since new fixtures, towel racks and even light switch covers weren't in the budget, I had to make do with what I had. 
The old brass light fixture was definitely dated, but it had good lines and an interesting shape. Enter: Matte black spray paint! (Also called "flat" black")


Before

After

We took the fixture off the wall and coated it with a couple coats of spray paint (no prep work needed, just slap it on there). I also ran the glass shades through the dishwasher and then shined them with some white vinegar and a rag.


For this project you could also use Rustoleum's Oil Rubbed Bronze paint, if your faucet and drawer pulls are finished in that color (a dark matt brown). 


I used black because I knew it would look better with the silver toned faucet and drawer pulls I panned to add. 


We added new LED lightbulbs. They are a bigger investment in the short term, but will pay off eventually in longevity and lower energy costs. For a more comfortable space be sure to look for "warm" LED's, the lower the "K" number the warmer the light. 2700K is the lowest and warmest I've seen. 

I also removed and painted two old pewter toned towel racks and a matching light switch cover. Instantly everything was updated and matching!


I's amazing what a can or two of spray paint can do!


Little Extras

It's the final touches that can really bring a room to life. Again I chose these things with cost in mind, and by that, I mean low cost!

For extra storage, add a shelf above your door. This white one I found inexpensively at a hardware store, and the black brackets holding it are from Ikea. 


For quick reference I labeled the bottom of baskets with their contents. 


Anytime you can corral items into baskets or bins (rather than just leaving them sitting out) your room will look more pulled together. This not only goes for bathroom products, but for things like DVDs and kitchen gadgets too. 

I replaced old tired hardware with new chrome pieces found in bargain bins or on sale. The chrome goes nicely with the painted black accents and the new stainless faucet (also purchased on clearance!).


Since there wasn't much of a mirror to begin with, I needed to figure out a new solution. Instead of putting up an expensive mirror meant for a bathroom I just hung a regular wall mirror. I was able to find a decent one with a black frame at a discount store. 


I also found a retro looking mirror at Home Depot that I hung on a side wall. I love mirrors because the reflect light and make a space feel larger. 


Above the window I added a (discount store) black curtain rod and black and white curtains. To keep the room light and bright I chose a sheer design. 


Since this is such a small space, to save money I only purchased one curtain panel. Then I just used pinking shears to cut it in half (regular scissors would have caused it fray).

I was super happy to find the black candle holders (originally marketed as Halloween decorations) on sale in November for 75% off!  The ceramic birds I found on clearance at Michaels.


The internet can be a great resource too. I found these black mirrors and metal star discounted on Overstock.com.


Crisp white towels were an easy choice because the go nicely with the white floor, and I can easily bleach them to keep them looking fresh and new. 

We also added a new lowflow toilet. Check with your city, often times you can get these installed for free, or get a rebate when you purchase one.

I'll leave you with these "Before and After" shots!


Before


After


Thanks for stopping by!

(Fun Fact: It actually took longer to get this blog post together than it did to do the actual bathroom! Haha!)


Linking up to these fun parties:
http://shabbynest.blogspot.com/2015/01/frugal-friday-little-late.html
http://tidymom.net/2015/im-lovin-linky-party/
http://www.justusfourblog.com/2015/01/pinworthy-projects-party-86/
http://www.dianarambles.com/search/label/Pin Meme
http://www.kitchenfunwithmy3sons.com/2015/01/kitchen-fun-and-crafty-friday-link_15.html
http://www.simplysweethome.com/2015/01/friday-favorites-week-251-featuring-cupcakes/
http://chiconashoestringdecorating.blogspot.ca/
http://thecharmofhome.blogspot.com/
http://www.frenchcountrycottage.net/2015/01/feathered-nest-friday_15.html
http://romantichome.blogspot.com/

http://www.funkyjunkinteriors.net/2015/01/pj-262-upcycled-link-party.html