google-site-verification: googlef2ba99a3ab5aecea.html
Showing posts with label Children. Show all posts

Tuesday, July 19, 2016

Waldorf Train Track Hack

waldorf train

My kids love trains, and playing with model train tracks. Meanwhile, I love the dreamy quality of a Waldorf inspired play environment, and the natural materials that most Waldorf inspired toys are made form.

Enter: Hand painted toy train tracks!

waldorf train


While there are many lovely brands and wooden train products available on the market, most of them are above our price range. Plus, many of the trains themselves are mechanical. I like the idea of having "back to basics" toys that don't use batteries. If my boys want their trains engines to roar, then they can use their own voices to make that happen!


Keeping these goals in mind lead me to Ikea of all places! Over the years, I've grown to regret most of my furniture purchases from this Swedish giant. But, I've found a lot of nice wooden toys there, and even a some good nature inspired kid's books.
One of our favorites is their inexpensive wooden train sets.


If you don't live near an Ikea store, you can order them from the manufacture on line. Or, since their shipping can be expensive, you can also find the trains on Amazon:


I am very inspired by the ideas and concepts of Waldorf education, and I make an effort to create an environment for my children that reflects this philosophy. One of the things that intrigues me visually about a Waldorf inspired space is the color. Dreamy rainbows and soft colors grace many of things in a Waldorf classroom.

In fact, one of the main mediums for creating art (in the Waldorf method) is through the use of watercolor paint.

Looking at our wooden trains stretching across the floor one day, I had an idea. I could use watercolor paint to add some beauty and magic to an otherwise plain looking toy!

waldorf train

I knew that the transparent nature of watercolor pigment would add lovely color, while still allowing the natural beauty of the wood to shine through.

Supplies:

Unfinished wooden toy train tracks

(If you don't want to use the Ikea ones, you could also use these):


Watercolor paint


A soft watercolor brush (sable is the best)


Jar with water (for rinsing brush)


This turned out to be a rather easy project. Both kids and adults could participate, and enjoy creating their own unique train set. Also, you could use any wooden train tracks for this project, they don't have to be the Ikea version.

Because I knew I wanted an ethereal airy quality, I decided to use two colors for each track. My goal was for them to blend together, and have one hue fade into the other.

waldorf train

To make this "blended" effect more seamless, I chose only analogous colors (colors that are next to each other on the color wheel, or in the rainbow). 


This lead me to chose from the following color combinations: 
Red and orange, orange and yellow, yellow and green, green and blue, blue and purple, and purple and red. 

waldorf train


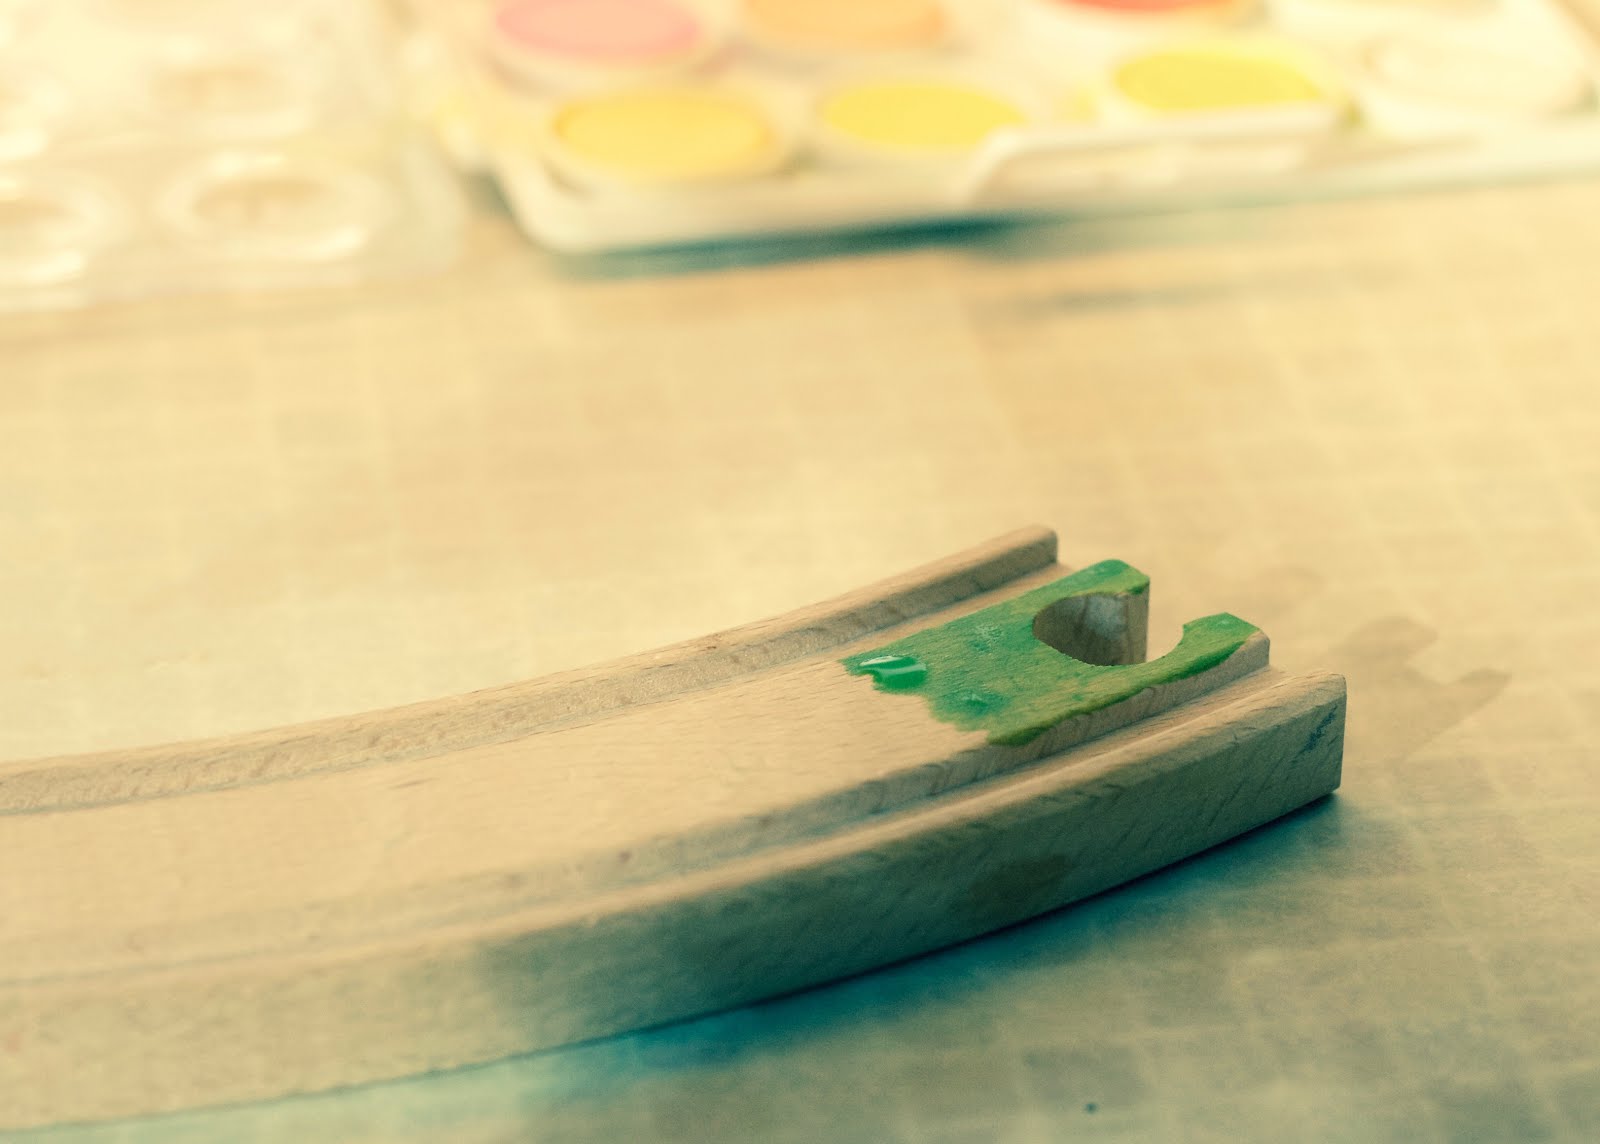
To start, I covered one end of a track with one color (in this case green). I wanted the pigment to be saturated near the outer end of the track so I applied a heavy coat (more paint, less water). 


Then, by diluting the paint with water, I pulled a small amount of the pigment toward the middle of the track. Eventually, it included such a small amount of color that it was practically clear. 


Also note that, if your brush is too wet, you can always remove a bit of the water by dabbing it on a paper towel. 

Next, starting at the opposite end of the track, I did the same thing with my second color choice (this time yellow).  I made the paint thicker at the end, and then thinned it as I worked toward the middle. 


I over lapped the two colors for about an inch. In this way the two hues blended together, one fading seamlessly into the next.


Or, if you would rather keep it simple (or perhaps if you are working with young children) you could simply paint each piece of track one color. The result will still be lovely! 

Some tracks are two sided. So after one side is dry, be sure to paint the other side too.

waldorf train


waldorf train


This is such a great way to create wonder and intrigue, and a beautiful play space.

waldorf train


Assemble your tracks, and enjoy!


waldorf train


Thanks for stopping by and happy crafting!

Linking up to these fun parties:

http://tidymom.net/2016/salad-recipes/


Saturday, February 13, 2016

How to Make a Daisy Chain


How to make a flower necklace

Spring is here (or near) and the daisies are blooming!


Nothing says "childhood" like an inviting patch of green clovers, and delicate white flowers.


The next time you come across these sweet signs of spring, try this simple craft.


How to make a flower necklace

First, pick a batch of flowers, trying to select the ones with long stems.


For the next step, I used a pocket knife, but your fingernail can work just as well.


Cut a small slit in the end of one of the stems. Be careful that it doesn't go all the way to the edge.

Next, thread the end of another flower through the hole you've just created. This should feel like threading a needle.


Then, gently pull one stem through the other, until the flower itself stops it from going any farther.

How to make a flower necklace
How to make a flower necklace 

After that, repeat the process over again, making a hole in the stem of the most recently added flower. Continue to do this until you have reached your desired length.


Soon you should have a chain of flowers!

Loop it around your neck, and tie a loose knot in the back.
Enjoy!


These can be made into crowns, bracelets, necklaces and more!


Also, after making these sweet chains, you may want to enjoy the classic book Daisy-Head Mayzie
By Dr Seuss


Daisy Head Mayzie


Thanks for stopping by, and happy crafting!


Linking up to these fun blogs:


http://www.flourmewithlove.com/2016/02/mix-it-up-monday-blog-party-without.html

Monday, January 25, 2016

How to Clean Block Crayons

I love using Waldorf inspired art supplies. One thing that is commonly found in a Waldorf classroom is a set of lovely block crayons.


The most commonly used brand is Stockmar Beeswax Block Crayons. These delightful crayons really are the best available! You can purchase them easily here:


Occasionally with use, and when stored next to each other these crayons can get a little messy. When they bump into each other they'll pick up the pigment from another color.

How to clean block crayons
Before


Recently I was lucky enough to purchase an entire bag full of them secondhand. However, these block crayons needed to be cleaned desperately!


How to clean block crayons

Luckily there is an easy way to clean block crayons. All you need is some coconut oil and a rag. I found that an old terrycloth rag worked the best.
This is a much-loved brand of coconut oil:


How to clean block crayons

Just cover the crayon in a generous amount of coconut oil and firmly rub off all of the extra pigment.

How to clean block crayons
How to clean block crayons 


How to clean block crayons This process does take a while, so be patient and keep at it!
Soon your crayons will begin to look like new.

How to clean block crayons


Before long I had a shiny "new" stash of clean block crayons!


If you don't happen to have any coconut oil on hand, you can also use olive oil, or even GooGone works. 

I can't speak to the toxicity of this stuff, but I can say it is a miracle worker!


Then, once they were clean I need a way to store them so that they weren't side-by-side anymore. I found this sweet crayon holder on Etsy. 

Hopefully someday I'll be able to fill in the missing spots by purchasing individual Stockmar stick crayons . But for now, this roll-up holder works great! 

 
Thanks for stopping by, and happy coloring!


How to clean crayons :)

Linking up to:

http://www.sewcando.com/2016/02/craftastic-monday-link-party.html

Sunday, June 21, 2015

Boy's Lazure Room

You may have seen my previous post about creating my daughter's rainbow room, using a painting method called "lazure".  In our new house I decided to try my hand at lazure again, this time in my boys' new room.


Hayley Brentmar


When we bought this house, this room was decorated in a very feminine style, complete with 80’s mauve curtains and accents. It wasn’t what I had in mind for my twin boys’ bedroom. The "before" photo is how it looked (with the seller’s furniture) when we bought the house.


Before

After we moved in, with two toddler’s in the mix, the room didn’t look much better!


During

It saw some hard days and a lot of playtime.  As you can see even the walls were "decorated"! Eventually, I went to work and transformed the room into a Waldorf inspired space for my boys.


hayley brentmar
After


hayley brentmar
After


Wall Color

The method I used for painting the walls is further detailed in my Lazure Tutorial post. But, here is a quick summary:

The first step in creating lazure walls is to start with a bright white base. I like to use off the shelf "ultra pure white" paint. 


I'm also careful to use a matte white. This creates the perfect surface for applying the transparent layers of color on the walls.


You will need:

-Water
-Paint brush (standard good quality wall paint brush)


-Bowl

-A soft cloth rag

-Liquid water color paint (I used Stockmar brand

-In this room, I also used some acrylic paint


Or you could even try using powdered pigment:


-A pigment binder like this (be sure you use matte):


-Large sponge


White acrylic paint


Mix Your Paint

You want a very thin mixture of color. It should still feel watery, and not thick like regular paint. I didn't measure very precisely. But here is the rough recipe:

-2-3 cups of water
-1/4 cup of polymer binder
-1-2 teaspoons of a single water color paint (you will need to mix up a new batch for each color)
-1 tablespoon of white acrylic paint

Mix well, I used the paint brush for mixing.

The next step is to begin applying the mixture to your walls. It is VERY drippy, so apply only a small amount at a time. I started at the top of the wall, and worked my way down to the floor, so that any drips could be easily wiped up with the rag.


Apply with the brush, using a swirling circular motion. Because I had textured walls I really had to "scrub" the color onto the walls. Then follow up with the sponge, using the same arm motions.  


lazure, boy's room, hayley brentmar

As I moved around the room, I changed the colors, fading one into the next.

lazure tutorial, hayley brentmar


Furniture 

Then, it was time to add "big boy beds". I knew I wanted beds that could also become bunk beds once the boys were older. But it was difficult to find convertible beds that were identical in size and shape when separated. Luckily, Amazon came to the rescue!


lazure, boy's room, waldorf walls


Eventually I will add wall hangings, art and photos in the big empty wall spaces. But that will have to wait until the boys are a little older. Right now they'd just pull anything that they could reach down! So stay tuned for an update in the future :)

Then it was time to add details!


I pulled the colors and theme of the room from this fabric. My mom made the curtains years ago for our first nursery. 

We attached several wooden crates to the wall for storage. 


hayley brentmar


Then I filled the crates with animal themed nicknacks, and other colorful things that matched the walls.

hayley brentmar

hayley brentmar

hayley brentmar


As the boys get older we will be able to add more items. 

I surrounded the top of the walls with these alphabet wall cards:


They are primarily shades of blue and green, so they match the walls perfectly. The animal theme is also carried through with them. 


hayley brentmar


Again, someday when the boys are older I will add more decor to the wall below them. 


For now the decor has to remain pretty sparse, and very kid-friendly. 


hayley brentmar


I found the wooden animals at The Goodwill, and used acrylic paint to make the turquoise. The Waldorf doll is from Etsy. He does have more clothes... somewhere!


Floor

For the floor I collected old sheets from thrift stores and used them to crochet a rag rug.


To create this rug, I used a combination of this tutorial, and lessons from a friend. It was a time consuming project. But it was nice because it was cost effective, and I was able to chose my own color pallet. 


hayley brentmar


Overall everyone seems happy with the way this room came together. We're looking forward to adding to it more and more in the future!


Before:


After:

 boy's room, lazure, waldorf


Thanks for stopping by!


Linking up to these fun parties:
http://www.skiptomylou.org/2015/06/22/made-by-you-monday-244/
http://madincrafts.com/mad-skills-party-264/
http://www.twelveoeightblog.com/2015/06/inspiration-monday-party-red-white-blue-fabulous.html
http://diyshowoff.com/2015/06/21/that-diy-party-49/
http://www.titicrafty.com/2015/06/bewitchin-projects-block-party-103/
http://www.sewcando.com/2015/06/share-your-projects-at-craftastic.html
http://www.thecasualcraftlete.com/2015/06/21/frugal-crafty-home-blog-hop-133/
http://www.flourmewithlove.com/2015/06/mix-it-up-monday-blog-party.html
http://www.gingersnapcrafts.com/2015/06/wow-me-wednesday-211.html
http://www.mygirlishwhims.com/2015/06/your-whims-wednesday-217-and-features.html
http://www.savvysouthernstyle.net/2015/06/wow-us-wednesdays-227.html
http://thenymelrosefamily.com/2015/06/whimsy-wednesdays-173.html/2
http://thehappyhousie.com/work-it-wednesday-4/
http://thewinthropchronicles.com/2015/06/share-it-link-party-172/
http://thediydreamer.com/from-dream-to-reality/show-off-your-creations-173/