google-site-verification: googlef2ba99a3ab5aecea.html
Showing posts with label DIY. Show all posts

Thursday, August 18, 2016

How to Make Drip Castles

Summer is almost over! We have been enjoying soaking up those last rays of warm sunshine, and spending as much time as we can outdoors! One thing we enjoy doing, both at home and on vacation, is going tho the beach and playing in the sand.

how to make drip castles

Growing up in San Diego, one of my favorite things to do as a child was go to the beach and build drip castles. I still remember the day my mom first showed me the simple magic that is a drip castle!

how to make drip castles

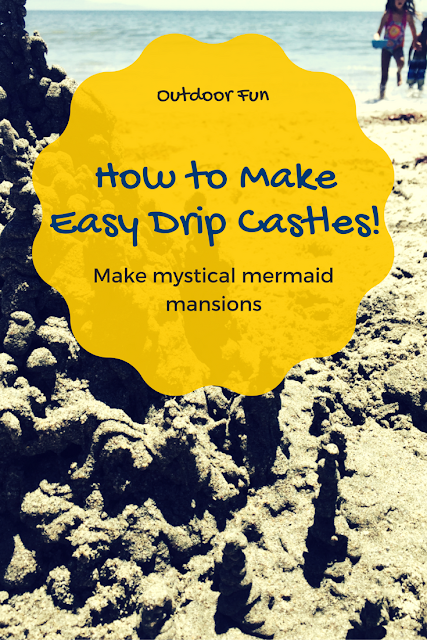
Drip castles rise from the shore like mythical mermaid mansions. But, they are also really easy to create! I've tried making these with (backyard) sand box sand, and it doesn't work as well. I'm not sure if you need the salty sea water, or the fine beach sand, but for some reason I've only been able to make these at the beach.

To start, make a regular sand castle (just a pile if damp sand). This will be your base.


Usually about a foot will be tall enough. But you can make your castle as elaborate and large as you want to!


Next fill a container with ocean water. We've had this little sand play set for years, and love it!


Next, add some sand to the water in your bucket. I usually fill it about 3/4 full of sand. You'll want to keep it VERY watery.


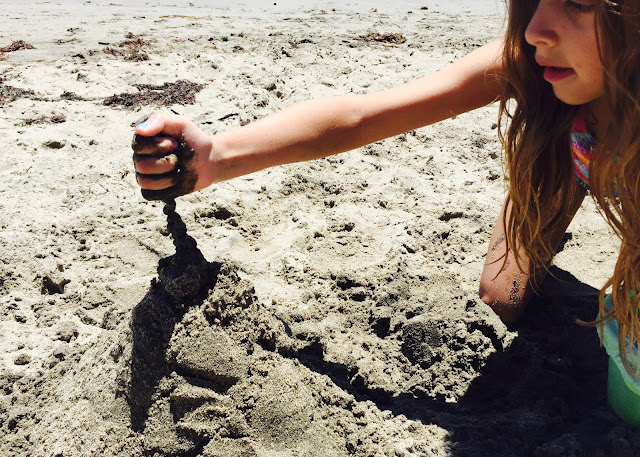
Now comes the fun part! Dip your hand into the water and grab a handful of sand. You want it to be very drippy. Then quickly (before too much of the water drains out) drizzle the sand onto your castle.

how to make drip castles

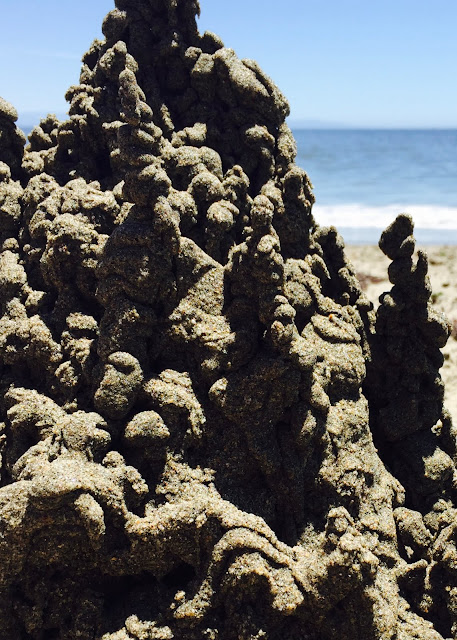
After a few seconds, the sand in your hand will become dry, and start to clump. That's when you know to go back for a fresh scoop. Eventually, you will notice the sand begin to pile up on top of itself, creating and otherworldly formations.
how to make drip castles
Add caption


Play around with moving your hand slowly to the side, and keeping it in one place. You'll discover that you can create a variety of shapes and towers!

how to make drip castles

It's fun to see how tall you can make them! Sometimes it can also be fun to add a few "guard towers" on the flat part around your castle.

how to make drip castles
Add caption


Sometimes, if we are very careful, we are even able to make small holes, tunnels and bridges!

how to make drip castles

If you stay at the beach long enough, eventually you'll notice that even once your drip castle is dry, it will still retain it's shape!
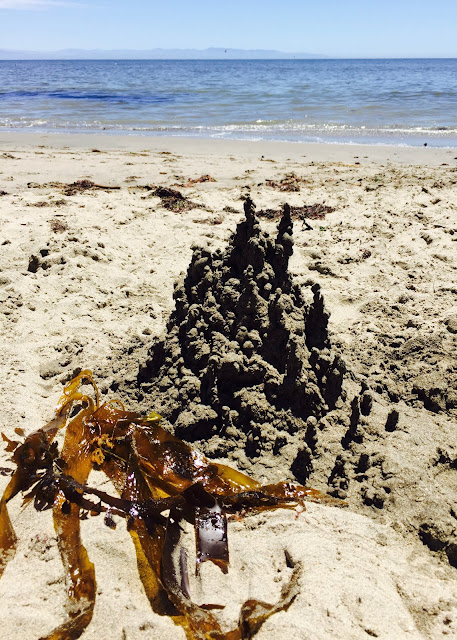
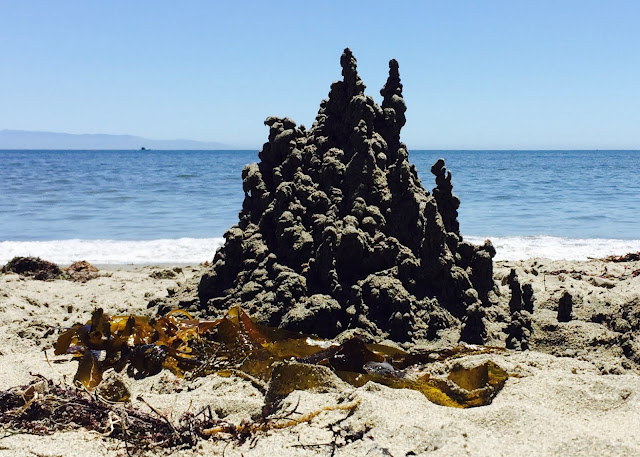
Encourage mermaids and other sea creatures to visit by embellishing your castle with found objects. Things like kelp and shells work great for this!
how to make drip castles
Add caption

Sit back, soak up the sun, and enjoy your handiwork!

how to make drip castles


That's all, thanks for stopping by!


Linkning up to these fun parties:

http://livelaughrowe.com/vegetable-side-dishes/
http://www.artsyfartsymama.com/2016/08/artsy-fartsy-link-party-3.html
http://staceyembracingchange.com/2016/08/18/creative-inspirations-linky-party-and-features-10/
http://www.posedperfection.com/2016/08/creative-ways-link-party-119-and.html
http://tidymom.net/2016/homemade-after-school-snack-recipes/
http://www.oneprojectcloser.com/creativity-unleashed-link-party/
http://www.mysuburbankitchen.com/2016/08/pinworthy-projects-party-162/
http://dianarambles.com/2016/08/pin-linky-party-203.html
http://www.avisiontoremember.com/2016/08/the-creative-exchange-august-18.html
Saturday, February 13, 2016

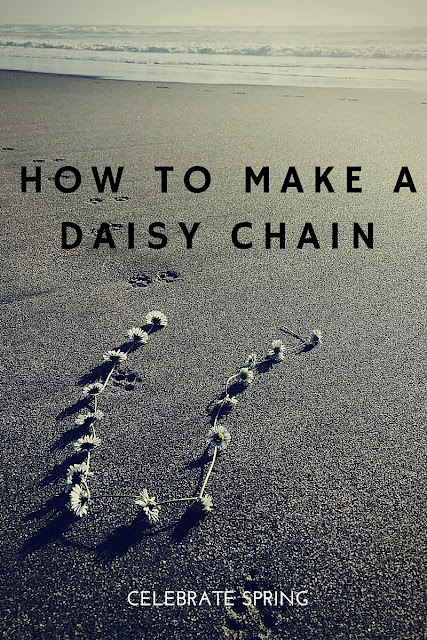
How to Make a Daisy Chain


How to make a flower necklace

Spring is here (or near) and the daisies are blooming!


Nothing says "childhood" like an inviting patch of green clovers, and delicate white flowers.


The next time you come across these sweet signs of spring, try this simple craft.


How to make a flower necklace

First, pick a batch of flowers, trying to select the ones with long stems.


For the next step, I used a pocket knife, but your fingernail can work just as well.


Cut a small slit in the end of one of the stems. Be careful that it doesn't go all the way to the edge.

Next, thread the end of another flower through the hole you've just created. This should feel like threading a needle.


Then, gently pull one stem through the other, until the flower itself stops it from going any farther.

How to make a flower necklace
How to make a flower necklace 

After that, repeat the process over again, making a hole in the stem of the most recently added flower. Continue to do this until you have reached your desired length.


Soon you should have a chain of flowers!

Loop it around your neck, and tie a loose knot in the back.
Enjoy!


These can be made into crowns, bracelets, necklaces and more!


Also, after making these sweet chains, you may want to enjoy the classic book Daisy-Head Mayzie
By Dr Seuss


Daisy Head Mayzie


Thanks for stopping by, and happy crafting!


Linking up to these fun blogs:


http://www.flourmewithlove.com/2016/02/mix-it-up-monday-blog-party-without.html

Monday, October 26, 2015

DIY Creepy Halloween Haunts

I tried to make non-scary Halloween decorations, but I failed. These things are SO creepy!

At least the kids don't seem to be too afraid of them.


Here's the basics of how I made these easy creepy haunts:

cheesecloth ghost


I came across this tutorial, from Martha Stewart... oh how I love Martha. She calls these creations "Cheesecloth Spirits", which sounded pretty tame to me. Here's what her version looks like:


I decided to give it a try! First I found the wig heads, for much cheaper on Amazon than the sources listed in the original tutorial. Because it's always good to use odd number grouping when decorating, I ordered 3.


I followed the directions on the tutorial, using a mixture of watered down Stiffy, and craft glue. But, it would work just as well with some outdoor mod podge.


To apply it I used a cheap foam brush. You could probably just use a sponge too.


This is a messy job, and you'll need LOTS of cheesecloth. I'd plan on at least several yards per "spirit". Start by placing a piece of cheesecloth over your Styrofoam head, coat with outdoor mod podge.


Continue to layer on more sheets of cloth, ripping the ends to give it an erie look.

But, once these were dry, the looked too plain to me. There wasn't much definition in the face, so I decided to bring more attention to the eyes.

cheesecloth ghost

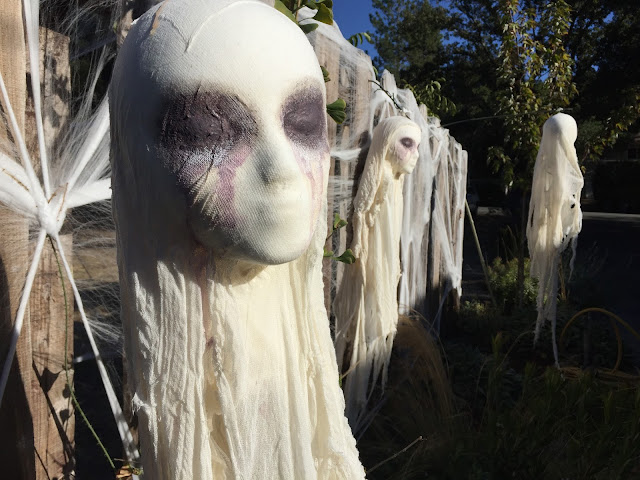
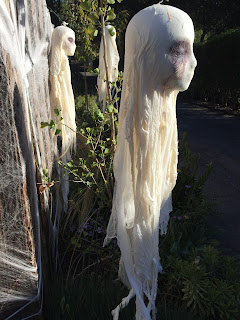
Using watered down acrylic paint, I added deep purple to the eye area. Because it was so watered down, it dripped down the face and into the folds of the fabric, causing a super erie "bloody tears" effect. You could use blood red, but I prefer subtlety suggestive halloween decorations. Overdoing it on the "blood and guts" always seems like kind of an easy cop-out to me. Subtle is creepier.


But, I have little kids in the house, and they looked a bit too creepy. So I decided to try to tone down the freaky factor a little bit.

cheesecloth ghost

For slight sparkle and texture I applied some mica flake medium that I had on hand.


I also covered up some of the dark purple with plain white acrylic. They were a little less disturbing after this.

cheesecloth ghost

Time for them to find a home!

I glued/ screwed white cup hook into the top of each head, and suspended them from small bamboo sticks.


cheesecloth ghost

Be sure you really rip up the cheesecloth at the bottom, so that there is plenty of extra fabric to flutter in the wind.


cheesecloth ghost cheesecloth ghost

I tossed a couple of strands of christmas lights in the bushes bellow these cheesecloth ghosts, because up-lighting is always spooky, and they were ready for fright night!

cheesecloth ghost


Happy Halloween!


Also, if you like DIY decorations as much as I do, you may enjoy this post:


Thanks for stopping by!


Linking up to these fun crafting blog parties:


http://www.flourmewithlove.com/2015/10/mix-it-up-monday-blog-party-without_25.html
http://www.funkypolkadotgiraffe.net/2015/10/too-cute-tuesday-linky-par-tay-256.html
http://myuncommonsliceofsuburbia.com/inspire-me-monday-83/
http://www.tipjunkie.com/post/tip-me-tuesday-happy-crafters-share-10-27/
http://cornerstoneconfessions.com/2015/10/titus-2-tuesday-179.html
http://thecraftyblogstalker.com/create-link-inspire-linky-party-100/
http://www.carolynshomework.com/2015/10/the-inspiration-board-creative-party_27.html
http://ladybug-blessings.com/?p=6329
http://www.gingersnapcrafts.com/2015/10/wow-me-wednesday-229.html#
http://www.mygirlishwhims.com/2015/10/your-whims-wednesday-234-and-features.html
http://www.savvysouthernstyle.net/2015/10/wow-us-wednesdays-245.html
http://thenymelrosefamily.com/2015/10/whimsy-wednesdays-191.html/2#
http://thehappyhousie.porch.com/delicious-fall-desserts/
http://thewinthropchronicles.com/2015/10/share-it-link-party-190/
http://justagirlandherblog.com/hit-me-with-your-best-shot-91/
http://thediydreamer.com/from-dream-to-reality/come-on-over-and-show-off-your-stuff-fdtr-190/
http://www.posedperfection.com
http://bloomdesignsonline.com/2015/10/lovely-little-link-party-49.html
http://staceyembracingchange.com/2015/10/29/creative-inspirations-linky-party-161/
http://www.artsyfartsymama.com
http://www.coloursaturatedlife.com/6-fabulous-fall-decor-ideas-brag-worthy-link-party-3/
http://livelaughrowe.com/around-the-house/


     style="display:block"
     data-ad-client="ca-pub-1259762351787524"
     data-ad-slot="8522386894"
     data-ad-format="auto">


Friday, October 9, 2015

Working With Ugly Carpet

Sometimes, working with a modest budget means that there are parts of your home that you simply can't change.  In other words, sometimes there are things that you just have to work with.  
In our new house, that "thing" was an unfortunate shade of mint green carpet.  

Before

When bought our house the walls were pink, and the carpet was green (my husband nicknamed it "pistachio").

Before

Staying within our redecorating budget meant that the carpet had to stay.  But there were aspects of the space that we could change. 

For example, we knew that we could paint, bring in new furniture and add natural light.  By making these feasible changes, we could still update the room with a fresh new feel.

To start, I created a Pinterest board where I began to gather ideas and inspiration.  Using everything from wedding cakes to clothing as inspiration, I gathered images of visually pleasing color combinations featuring mint green. 


Shades of green look lovely and modern when paired with red.  Green and red are considered "complementary colors," so they tend to go well together. 


Grey is a popular color in interior decorating right now.  So, to update the space, I added a trendy midcentury modern style couch, in a rich warm grey.

I was pleased to find this sofa at CB2 (an affiliate of Crate and Barrel).  Both Crate and Barrel, and CB2 are excellent sources for reasonably priced, midcentury modern inspired pieces.

avec sofa


Next, I painted the walls using my favorite go-to paint: Benjamin Moore, #925 (the perfect warm white). 

We also added three inexpressive sun tunnels into the ceiling. Sun tunnels are a budget friendly alternative to traditional skylights, and they will flood your space with natural light. 


We purchased the two accent chairs from the previous owner, and had them reupholstered.  To see "before and after" images of these chairs click here.


I found inexpensive throw pillows in perfect coordinating colors at Target, and added them to the seating areas.
I also purchased a grey "poof" for extra seating,  and painted the dated fireplace white.


Then I added red curtains that echod the modern color pallet. 

To give the illusion of larger windows and let in the most light, always hang your curtains so that they rest directly in front of the wall to either side of the window (the idea is to hang them so that they don't actually cover any of the window itself when they are open). 


Eventually we will replace the carpet with wood.  But in the meantime, we have an updated and comfortable space to enjoy.

Before

After


Thanks for stopping by!


Linking up to these fun parties:

http://www.simplysweethome.com/2015/10/friday-favorites-week-289/
http://chiconashoestringdecorating.blogspot.ca/2015/10/flaunt-it-friday-276.html
http://www.oneprojectcloser.com/creativity-unleashed-link-party/