Still, the kitchen felt cramped and oddly arranged. Overall it was not very user friendly or functional. So after living with it for about a year, we decided it was time for a complete overhaul.

Before we bought this house, the kitchen had seen some hard days, and apparently a lot of college parties. But, I love a good project!
Before Photos:
 |
| Original "cold storage"; Before |
 |
| Gas range, before |
 |
| Refrigerator, before |
But, I did! I knew that hidden under all of this grime, was a charming beach bungalow (originally built in 1928). And, I couldn't wait to bring it back to it's former glory!

Take out your frustrations, give a cabinet a good whack with a sledgehammer!
We even re-purposed some of these old cabinets into a playhouse for our children. For details on that project, see this post.


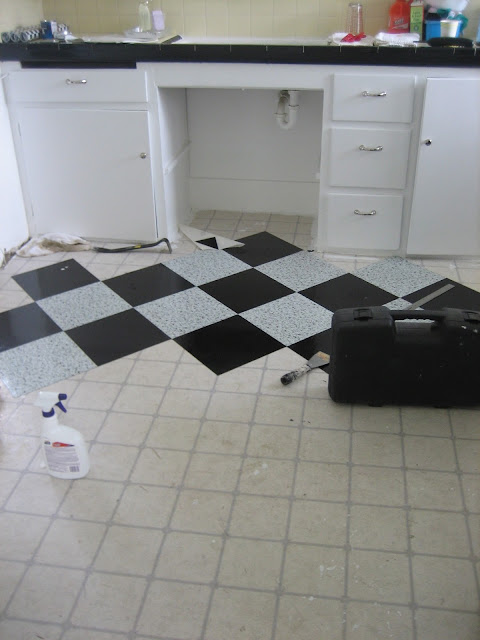
*Note: We installed the floor about a year before the actual remodel. But, I had purchased extra tiles. So, it was easy to fill in any gaps later, after we removed the original cabinets.
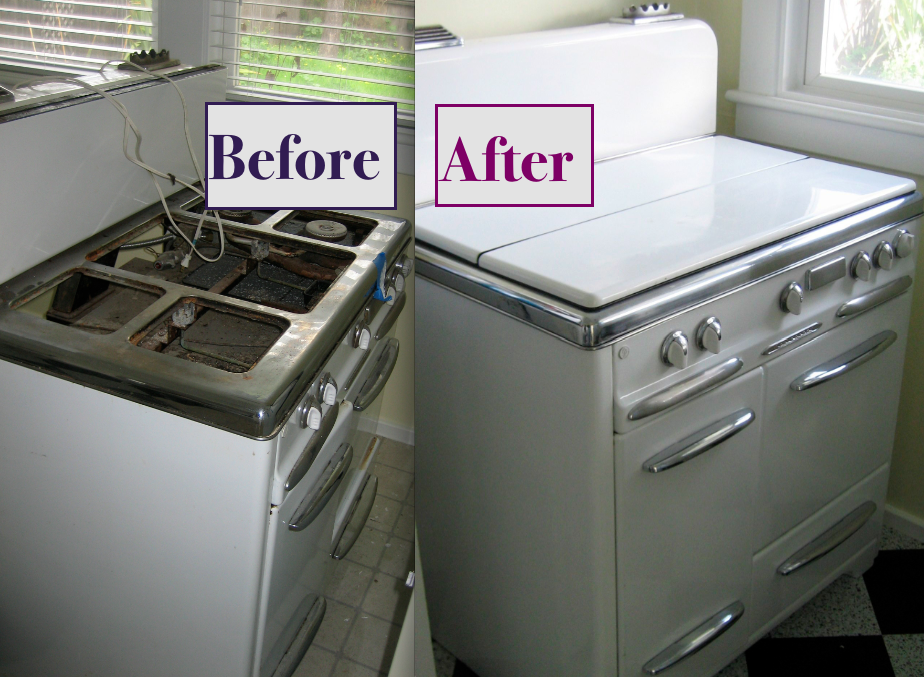
We purchased an old classic range from Craigslist, that was contemporary to the time the home had originally been constructed. I spent an entire day scrubbing the grossness out of the range (see photo below).

Then... countertops. Oh, how I wanted the clean smooth finish of granite counters! But, it simply wasn't in the budget.

 |
| Kitchen corner, before |
 |
| Kitchen sink, before |
When it was time to remodel and rearrange I set up a temporary "make-shift" kitchen in the laundry room, and we went to work.
The first step was the really fun part. We broke out the sledgehammer, sawzall and a chisel. Because it was time for:
The first step was the really fun part. We broke out the sledgehammer, sawzall and a chisel. Because it was time for:
Demolition!

We even re-purposed some of these old cabinets into a playhouse for our children. For details on that project, see this post.

A note about old houses and with lath and plaster walls (as seen in these photos). Unlike today's modern sheet rock, traditional plaster crumbles! Once you start chipping away at it, the whole thing just starts to crumble away. So, unless you have to remove it because of water damage, it's best to chip with care and caution. Or, better yet, just leave it alone whenever you can!

We went over the old linoleum floor with simple peel and stick vinyl tiles. I found the best price for these colors on ebay. They are super easy to install, and easy to replace if an individual one gets too worn.

*Note: We installed the floor about a year before the actual remodel. But, I had purchased extra tiles. So, it was easy to fill in any gaps later, after we removed the original cabinets.
We purchased an old classic range from Craigslist, that was contemporary to the time the home had originally been constructed. I spent an entire day scrubbing the grossness out of the range (see photo below).

I have no idea what that gelatinous gunk was, but with the help of oven cleaner and a scrub brush, I was able to get it out.
Here are the products that I had the best success with while tackling the grossness:

To really get in all the nooks and under the edges of this stove, I literally used dental tools to scrap out all of the gunk! They were great for the detail work.
I have a friend who's a hygienist, and she gave them to me. But, it looks like you can buy anything on Amazon these days! I've been surprised how any times it's been handy to have these little gadgets:
Here are the products that I had the best success with while tackling the grossness:
And, for brightening dingy chrome surfaces, it works well to scrub them with dry steelwool.
To really get in all the nooks and under the edges of this stove, I literally used dental tools to scrap out all of the gunk! They were great for the detail work.
I have a friend who's a hygienist, and she gave them to me. But, it looks like you can buy anything on Amazon these days! I've been surprised how any times it's been handy to have these little gadgets:
Finally it was time to order new cabinets (prefab white vinyl). We took careful measurements and a salesperson there helped us with the best possible configuration. They delivered them, and we installed them ourselves.
Then... countertops. Oh, how I wanted the clean smooth finish of granite counters! But, it simply wasn't in the budget.
Enter: Budget friendly 12" granite tiles!
They are primarily designed for use on floors or walls, but these tiles also work well on a countertop! We simply took the edge pieces to a local stone and marble shop to have put a "bullnose" (rounded edge) put on them. Then we on the counter installed them like we would have with any other tile.

I had a lovely granite counter, for a fraction of the cost of a slab! A small strip of white corner trim under the tiles completed the look.
We moved some plumbing and relocated the sink, so that it looked out over my garden (instead of the parking lot next door), added a small dishwasher, and reused the cabinet hardware I'd found on sale at Restoration Hardware.
We moved some plumbing and relocated the sink, so that it looked out over my garden (instead of the parking lot next door), added a small dishwasher, and reused the cabinet hardware I'd found on sale at Restoration Hardware.
Soon, we had an entirely different kitchen!


http://www.flourmewithlove.com/2015/07/mix-it-up-monday.html
After
 |
| Range, skink, counters and floors: After |
 |
| New corner with passthrough, after |
 |
| After |
We stayed with a style that would reflect the age and original charm of the home. But, also we did so while simultaneously adding in modern conveniences. Little things like a classic beveled edge subway tile backsplash, a black and white color pallet and red accents brought the space to life.
It was such a relief to have a shiny, new, and functional kitchen!
For more about this little beach bungalow, and the many changes we made there, please see the following posts:


Thanks for stopping by!
Linking up to these fun parties!
http://www.flourmewithlove.com/2015/07/mix-it-up-monday.html
http://www.pintsizedbaker.com/2015/07/two-cup-tuesday-no131.html
http://www.gingersnapcrafts.com/2015/07/wow-me-wednesday-213.html
http://www.savvysouthernstyle.net/2015/07/wow-us-wednesdays-229.html
http://www.thelifeofjenniferdawn.com/2015/07/a-little-bird-told-me-weekly-link-party.html
http://thenymelrosefamily.com/2015/07/whimsy-wednesdays-175.html/2
http://thehappyhousie.com/work-it-wednesday-with-features-12/
http://thewinthropchronicles.com/2015/07/share-it-link-party-174/
http://thediydreamer.com/from-dream-to-reality/unique-fun-summer-projects-fdtr-175/
http://livelaughrowe.com/delicious-burger-ideas/
http://www.artsyfartsymama.com
http://staceyembracingchange.com/2015/07/09/creative-inspirations-linky-party-146/
http://bloomdesignsonline.com/2015/07/lovely-little-link-party-33.html
http://www.elizabethandcovintage.com
http://www.posedperfection.com/2015/07/creative-ways-link-party-61-and-features.html
http://www.shabbynest.blogspot.com/2015/07/frugal-friday_9.html
http://www.simplysweethome.com/2015/07/friday-favorites-week-276-with-ice-cream-recipes/
http://www.kitchenfunwithmy3sons.com/2015/07/kitchen-fun-and-crafty-friday-link_9.html
http://thecharmofhome.blogspot.com/2015/07/home-sweet-home-228.html
http://www.frenchcountrycottage.net/2015/07/feathered-nest-friday_9.html
http://romantichome.blogspot.com/2015/07/solar-powered-light-up-mason-jar-lids.html
https://easypeasypleasy.com/2018/06/07/funtastic-friday-link-party-182/#more-4285


