It's no secret that I LOVE decorating for Halloween. But, since I don't have a big budget, I need to get creative!
I am so excited because low cost pumpkins are appearing on the shelves of Dollar Tree stores!
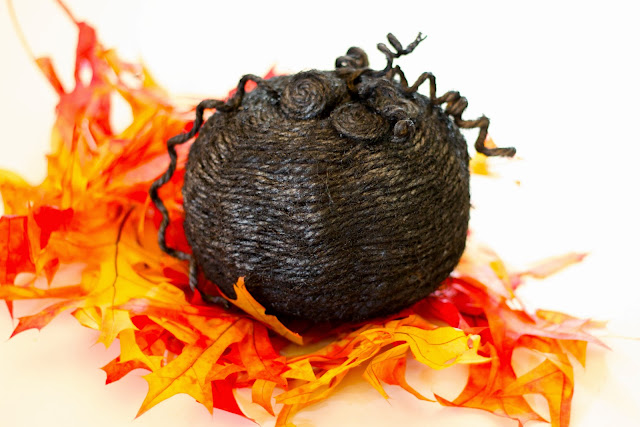
Since I wasn't down with the fake florescent orange, the first thing I did was create a dark jute pumpkin. This was super easy to do.
 |
| In all their "before" glory |
 |
| Jute pumpkin "after" |
Here is what you'll need:
-Jute Twine (I used 2 sizes, one thick and one thin)
-Hot Glue Gun (with glue refills)
-Rustoleum oil rubbed bronze paint
-Junky styrofoam pumpkins
-Scissors
-White craft glue (Elmer's would work fine too)
-a few pens or pencils (that you don't care about)
Add Jute
Start by winding a small spiral of twine (I used a thinker twine for the bottom half because it made the job a lot faster).
Using your hot glue gun (and being mindful not to stick your fingers into any of the hot glue) attach the spiral to the bottom of the pumpkin.
Then, adding glue directly onto the pumpkin as you go, wind the twine around your original spiral.
 Continue winding and glueing, working your way up the sides of the pumpkin. About half way up I switched to thinner twine (the thick twine would have been difficult on the details near the top).
You can gently push the twine into the ripples and valleys of the pumpkin, in order to echo it's shape. Don't worry if a little orange shows through, we'll cover that with paint later.
Details
Now you are ready to create embellishments for the top of your pumpkin. Start by making spirals, about the size of a silver dollar. Secure them with a line of glue across the back.
Spray baby spray
Now comes the extra fun part! Take your pumpkin outside, and put it on a surface you don't care about (old cardboard works well).
Spray liberally with the Rustoleum Oil Rubbed Bronze paint. You don't need to worry about drips because the jute will soak them up.
While your first coat of paint is drying, begin making the curly Vines.
Curly Vines
To make the curly vine toppers, begin my mixing craft glue and water. I didn't really measure mine out, but it was roughly 4 parts water to one part glue.
I used the same old mason jar that we use when we paint.
 Remove the strands and wind them around a pencil or pen. Lay them out in the sun to dry. Or leave out overnight inside.
It might take a couple of hours for them to dry completely. The glue will stiffen the twine.
 Once the twine on the pens is dry, carefully unwind it. The glue should have stiffened the twine into a spiral shape.
 Spray these spirals with the same spray paint, and hot glue them to the top of your pumpkin. Allow one or two to spill down the side.
Enjoy!
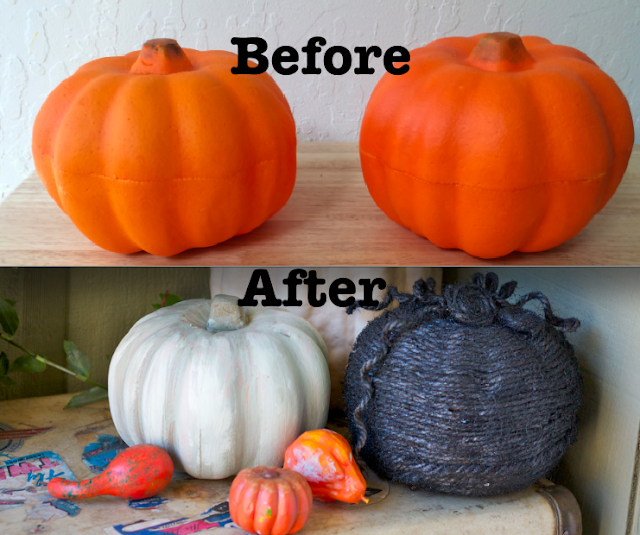
But, I didn't stop there... There were more Dollar Store pumpkin to be made!
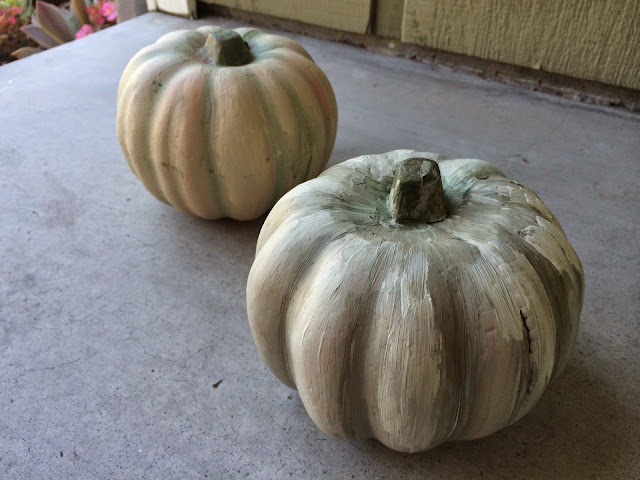
Painted Pumpkins
 |
| Before |
 |
| After |
Materials:
-Assorted acrylic paints
-A pallet knife
-Paper Pallet, or pallet
-Assorted Brushes
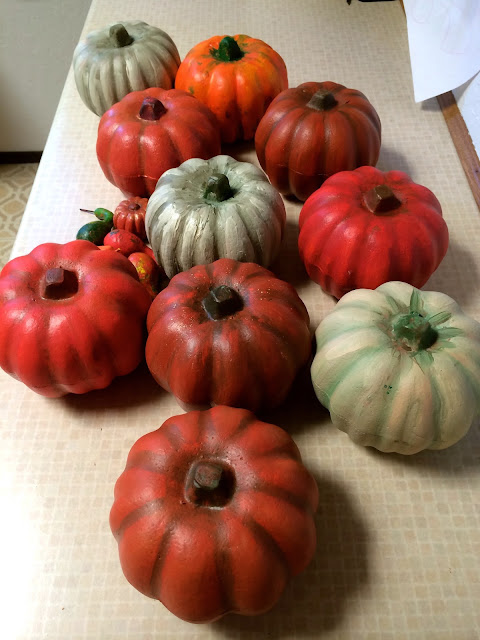
I used the pallet knife, and pallet paper for mixing and creating colors. I tried to mimic the colors of natural pumpkins. I used muted oranges, grey greens, dark rusty reds and even very light green/ grays.
The more you can mix your own colors (rather than use one color directly from the tube) the better. This will result in more realistic shades and tones.
One thing I did that helped give the illusion of a real pumpkin, was fill in the dips/ valleys with a darker color. I also highlighted the parts of the pumpkin that stuck our with a lighter color. I tried to make each pumpkin unique, and even added imperfections intentionally.
Also, it's important to switch up the brushes you're using. Variation in brush strokes and size adds interest and looks more professional.
They should be dry in about an hour, and then you can decorate!Try mixing them with real pumpkins and your jute pumpkin, to create an interesting Autumn themed still life.
Pumpkins on Sticks
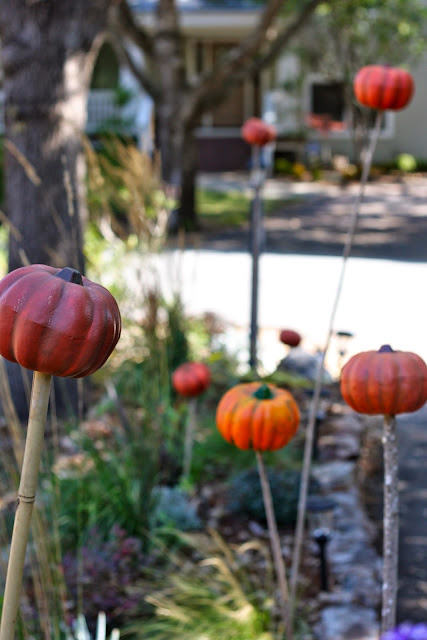
I had a feeling that if I just set the lightweight pumpkins on the ground outside they'd blow away eventually. So, what was I to do? Put them on sticks!
 Using bamboo garden stakes, I carefully punched a hole in the bottom of each pumpkin. Then I displayed them along our driveway. It's funny and festive!
*Update*
2016: These painted pumpkins have been through a couple of Halloweens outside, and they've held up perfectly!
Enjoy the season!
Linking up to these great parties:
Thurs
http://allthingswithpurpose.com/2014/09/things-thursday-link-party-51/
http://livelaughrowe.com/fall-home-decor/
http://www.artsyfartsymama.com/2014/09/artsy-corner-link-party-4.html
http://staceyembracingchange.com/2014/09/25/creative-inspirations-linky-party-102/
http://bloomdesignsonline.com/2014/09/link-party-86.html
http://ithappensinablink.com/2014/09/clever-and-quick-crafts.html
http://www.posedperfection.com/2014/09/creative-ways-link-party-21-and-features.html
Wed:
http://www.gingersnapcrafts.com/2014/09/wow-me-wednesday-173.html
http://www.mygirlishwhims.com/2014/09/your-whims-wednesday-181-and-features.html
http://milkandcuddles.com/2014/09/mommy-club-link-up-9/
http://www.savvysouthernstyle.net/2014/09/wow-us-wednesdays-188.html
www.familyhomeandlife.com/2014/09/wow-us-wednesday-link-party_23.html
http://www.thelifeofjenniferdawn.com/
http://thenymelrosefamily.com/2014/09/whimsy-wednesdays-134.html/2
http://thehappyhousie.com/work-wednesday-features-3/
http://thewinthropchronicles.blogspot.com/
http://bubblynaturecreations.com/2014/09/make-bake-create-78-link-up-here.html
http://thediydreamer.com/from-dream-to-reality/decor-ideas-patterns-and-colors-136/
Tues:
http://funkypolkadotgiraffe.blogspot.com/2014/09/too-cute-tuesday-linky-par-tay-205.html
http://myuncommonsliceofsuburbia.com/inspire-monday-26/
http://www.abowlfulloflemons.net/2014/09/one-project-at-a-time-92314.html
http://www.tipjunkie.com/post/tip-me-tuesday-happy-crafters-share-9-23/
http://www.tinysidekick.com/makers-link-party-36/
http://thecraftyblogstalker.com/create-link-inspire-linky-party-43/
http://www.carolynshomework.com/2014/09/the-inspiration-board-creative-party_23.html#
http://ladybug-blessings.com
http://www.savvysouthernstyle.net/2014/09/wow-us-wednesdays-188.html





Thanks for linking to Create Link Inspire at The Crafty Blog Stalker. You have been featured and pinned! Thank you for sharing.
ReplyDelete–Katie, TheCraftyBlogStalker.com
That's so cool, thank you!
DeleteWow! Such great ideas!
ReplyDeleteI love the pumpkins on sticks :) Too cute! This will be a perfect craft! Cannot wait to try this out. Thanks! Started following you on Google+
ReplyDeleteWhat fun pumpkins! Thanks for sharing them at The Project Stash Link Party Last Week....we featured them! http://goo.gl/UxXsaO
ReplyDelete