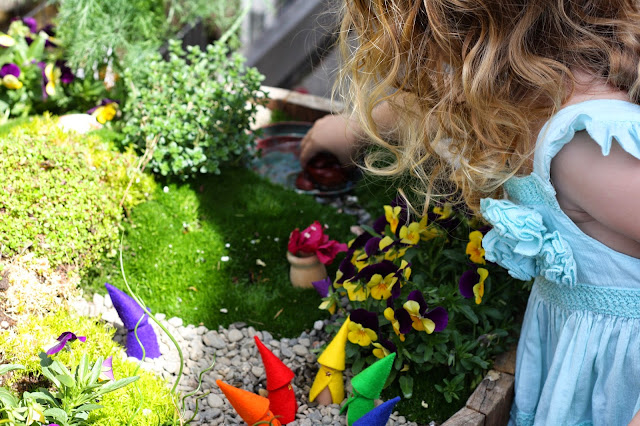
Over the last few years we have been cultivating a fairy herb garden. It's been with us through several moves, many seasons, and it continues to grow! All 3 kids love playing with this miniature and magical world.
We are convinced that fairies visit often too!
We are convinced that fairies visit often too!
We started with a large oak barrel (find at garden supply stores or wineries). Then we filled it with organic potting soil.
*Handy to know* One way to save money on soil is to add packing peanuts or drainage rock, under the dirt. Another handy trick, is to line the bottom with a few disposable diapers. They will help retain moisture and reduce the need to water.
Then, the fun part really began!
First, we added plants, and a few special treasures from our yard.
First, we added plants, and a few special treasures from our yard.
 |
| Herbs mingle, to wrap around a carved redwood mushroom. |
Since I wanted this to be a safe and inviting place for children, we chose plants for both aesthetics and safety. Considering the fairies, we added plants for their small stature, choosing delectable specimens with small leaves and magical qualities.
| Curly grass adds a magical element, while a hidden egg treasure nestles in canopy of thyme. This vigorous (and easy to grow) herb arches over Fairy Beach |
For ourselves, we wanted the plants to be safe. There are only non-poisonous, thornless, and even some eatable plants in our garden. Aromatic herbs (like rosemary and thyme) add the additional element of delightful scent. This is why I like to call it, our fairy herb garden.
We love to use these herbs for cooking, or to just rub the leaves between our hands and enjoy the lovely scent.
 |
| Welcome Fairies! This ladder (originally made for a bird cage) provides entrance access for non-wingded magical creatures too! |
 |
| Springtime flowers beckon along side a small garden path. |
 |
| Bubbles and a blue gnome! |
 |
| Clay mushrooms cling to a mossy side |
 |
| An acorn flagpole stands at the cave entrance |

To make the cave, we turned a ceramic pot on it's side and buried the bottom half. Then we covered the top with moss and creeping thyme. The inside we filled with pea gravel and an interesting stone. This makes a great Lenten Garden during Easter too!
We even created a special garden swing for the fairies to enjoy. (Tutorial here)
Soon fairies began to arrive!
Ready-made miniature fairies are pretty easy to come by. There are usually some available in garden centers or even on Amazon. This little fairy pictured above came to us via a clearance rack steal! When we found her, she was oddly painted, and one wing was broken. But we saw her potential immediately! (Witness her transformation here).
The fairies really enjoy the cool garden waters, and their very own "Fairy Beach"!
 |
| A fairy perches on a geode surrounded by a "fence" of old hardware. |
I've been collecting old faucet parts for years, and found that they made a great border for our garden!
 |
| Just add kids! |
 |
| Our fairy garden was once part of our small patio |
 |
| The garden in it's newest home |
You may also like these fairy garden posts:
Come play again soon!
Hayley Brentmar


LOVE IT! I will be back with my shopping list! Nevermind my last comment about needing this tutorial...
ReplyDeleteI'd love to give any tutorials you want! Gather up some sticks and we'll build the hut together!
ReplyDelete